September 20, 2018
The supported versions of Excel include the following: Excel 2010, Excel 2013, and Excel 2016. Although not explicitly supported, there are currently no known issues when using the add-in with Excel 2007.
The supported versions of Essbase include 9.3.0 and higher.
This release contains the following fixes and changes:
Add-In XCopy Installer – Add support for trusting the deployment signing certificate as a post-install task via two additional command line parameters. Certificate trust can be accomplished by placing the deployment signing certificate alongside the Dodeca Excel Add-In for Essbase XCopy installer and adding the parameters below to the command used to launch it. #1994
An example usage for a fully silent, trusted installation where the certificate password is “password” might look like the following:
“Dodeca Excel Add-In for Essbase 7.6.0.6549.exe” /S /trust /password=passwordAdd-In XCopy Installer (.msi) – Introduction of a dual-purpose Windows Installer package for the Dodeca Add-In that supports either per-user or per-machine XCopy installation of an Add-In deployment. By default, the package is signed with the deployment signing certificate, though this option can be configured from the ClickOnce Prep Utility. The package runs in per-user configuration by default. #2066
An example usage for a silent, per-machine installation might look like the following:
msiexec.exe DodecaExcelAddInForEssbase.7.6.0.6549.msi /quiet ALLUSERS=1- Send [Fixed Issue] – When using a stateful connection, the following error is encountered when sending to Essbase multiple times: Cannot perform operation as member selection is not open. #2034
Fixed the following issues in the Spreadsheet Toolkit:
- To address an inconsistency between the Classic Add-In and the Dodeca Add-In related to the handling of string arguments, function string argument values are now trimmed to remove leading and trailing blanks. This allows for fixed length strings to be used in macros. #1991
- EssVSetSheetOption – When EssVSetSheetOption(Empty, 16, True) is called to enable Free Form retrieval mode, a subsequent call to EssVSetSheetOption(Empty, 16, False) does not reset retrieval mode to Advanced Interpretation. #2012
- EssVSetSheetOption/EssVGetSheetOption – Unlike the Classic Add-In, the functions required that the active sheet be connected, and if not connected, would display the login dialog. Note that setting and getting the alias table and dynamic time period will continue to require an active connection. #2032
- EssVConnect – When an invalid argument value is passed to the function resulting in a failed attempt to connect, the login dialog is inappropriately presented. #2027
- When called or displayed from VBA, the Sign On dialog does not allow the user to specify or change the Essbase Server. This behavior is inconsistent with the Classic Add-in. #2057
- Essbase Calculations [Fixed Issue] – The Essbase Calculation dialog does not present the runtime variables for a calculation that includes runtime variables. This was likely introduced in the 7.5.0.6430 release. #2015
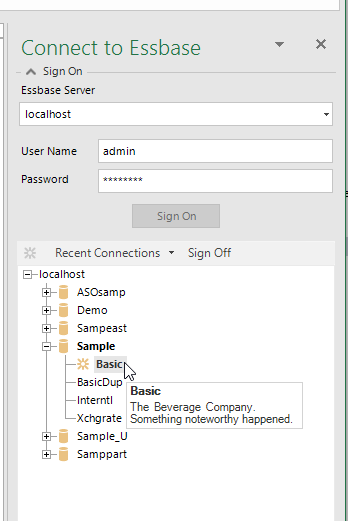
The Connect to Essbase task pane displays the database description and “Note of the Day” in the tool tip. Previously, only the description was displayed for a database. #1792
- Fixed Issue: The following error may be encountered when retrieving on a password protected worksheet: Unable to set the NumberFormat of the Range class. #2059
EIS Drill-through Reports
For consistency with the Classic Add-In, the ability to execute an EIS drill-through report on multiple data cells is now supported. #2031
As with the Classic Add-In, the following caveats apply:
- The selected cells must represent members in single dimension.
The selected cells must have a common parent and come from the same relational column.
Also note that Essbase Studio drill-through reports are not supported.
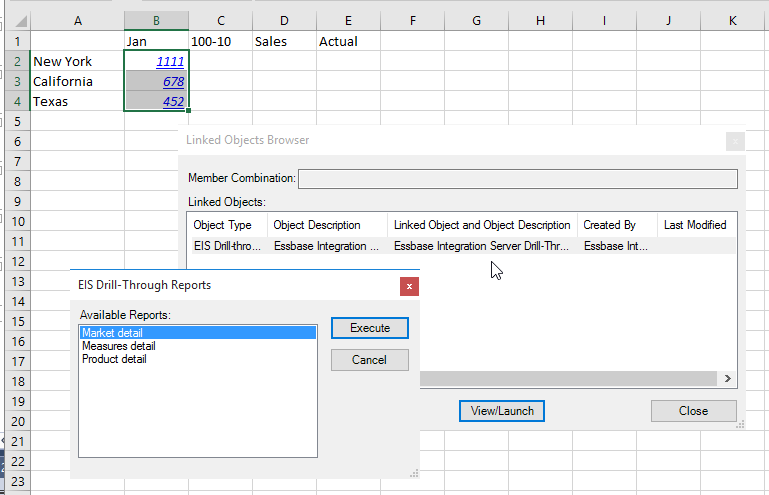
To be able to more easily open the Linked Objects Browser for multiple cells, a Linked Objects button is available in the ribbon.
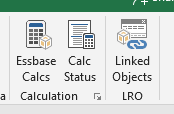
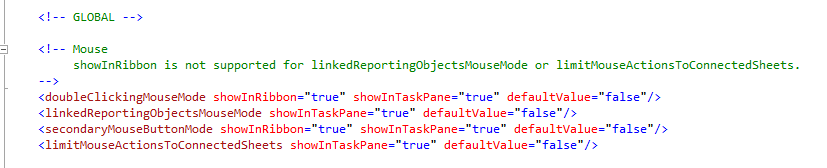
The button is automatically added to the ribbon when the Mouse Action / Double-Clicking Enabled / Linked Object Browsing Enabled option is configured to show in the task pane.
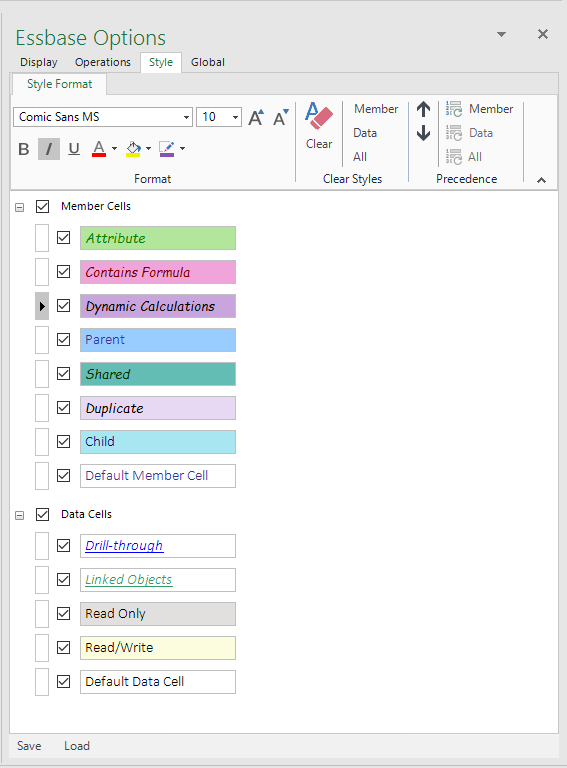
Styles
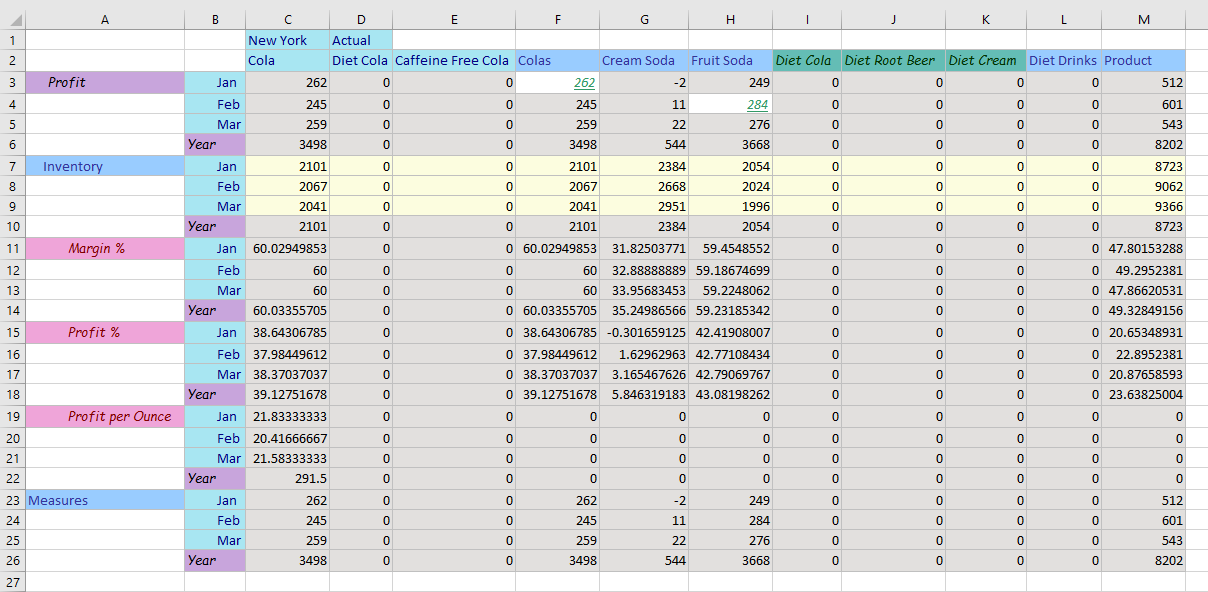
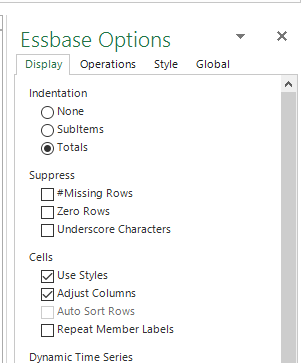
This release supports the ability to assign formatting, including the font, font color, fill or background color, and/or border color to visually distinguish different types of member and data cells. The Essbase Options Display tab includes a new Cells option. When the Use Styles option is checked, the style formats defined on the Style tab are applied to the results of any retrieve operation. #1934
Unlike the Classic Essbase Add-in, the same style cell formats are used for all connections, so you do not have to connect to Essbase before editing the styles.
The Style tab is initially presented as in the screenshot below with all the styles unchecked, which indicates that the styles are disabled or inactive. The checkboxes to the left of Member Cell Styles, Data Cell Styles, and the individual styles are used to enable or activate the styles.
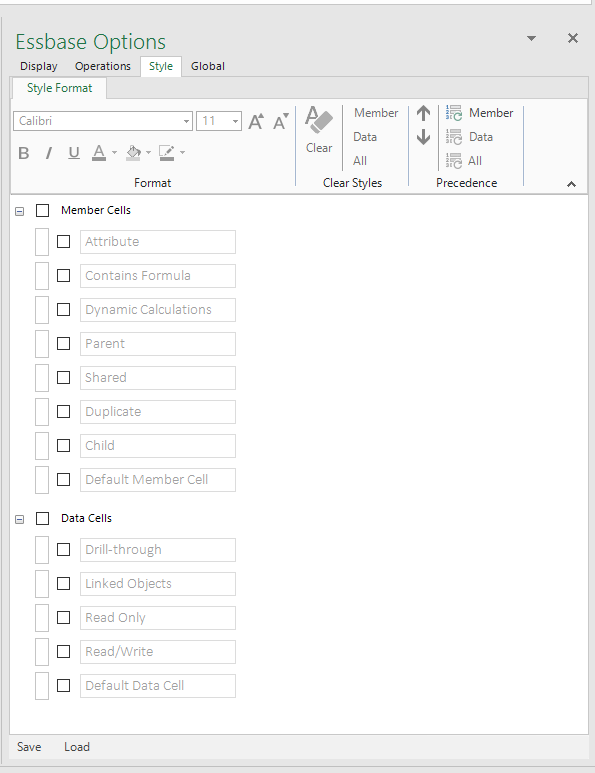
The Format tools allow for optionally specifying a font name, font size, font color, bold, italics, underline as well as a fill or background color and border color.
The Clear Format tools support the ability to clear the formats associated with a specific style, member cell styles, data cell styles, or all styles.
The Precedence tools restore the default order in which the styles are listed and evaluated.
When a retrieve operation is performed, the styles are evaluated as listed in descending order of precedence. For a given member or data cell, the first active (checked) qualifying style is used. By default, the Member Cells styles are listed in the following order: Parent, Child, Shared, Contains Formula, Dynamic Calculations, Attribute, Duplicate, and Default Member Cell. The Data Cells styles are listed as Drill-through*, Linked Objects (Cell Notes, File, and URL), Read Only, Read/Write and Default Data Cell.
*EIS Drill-through reports only. Essbase Studio drill-through reports are not supported.
The order can be changed by first selecting a style and then using the up/down arrow in the ribbon or by dragging and dropping. The Default Member Cell and Default Data Cell styles cannot be moved, since these styles are applied when a given cell does not qualify for any active style.
The Save and Load buttons at the lower left of the Essbase Options task pane can be used to save and restore (from the last save) all the options, including the styles.