Next Generation Outline Extractor
Introduction
The OlapUnderground Outline Extractor is a tool that extracts information from the outline of an Oracle Essbase cube in multiple formats which are easy to interpret and handle. This tool simplifies the process by guiding a user through the extraction in a step-by-step manner.
Installation
Installation of the Next Generation Outline Extractor only requires that all files be extracted from the distribution’s .zip file to a single directory, and that a Java Runtime Environment (JRE) is properly installed.
Note:
Your desired Essbase version
filesneed to be copied to thecurrentdirectory which are located inessbasedirectory before you start via Command Line or GUI after extraction from the zip.
Run via Command Line
To start the Next Generation Outline Extractor via command line, there must be an existing properties file, the command line does not create a .properties file. The command line extractor (ran via olapunderground-outline-extractor.cmd by default) looks for the “<InstallDIR>/classes/extractor.properties” file if one is not specified in the command line.
To change command line arguments, open olapunderground-outline-extractor.cmd in a text editor and find:
:runGui
%_JEXEC% -jar olapunderground-outline-extractor.jar
After olapunderground-outline-extractor.jar, any of the following arguments can be added:
-username <Username> Specify the username for the Essbase server
-password <Password> Specify the password for the Essbase server
-properties <PathToProperties> Specify the path (relative or absolute) to the .properties file
Advanced arguments:
-<PropertyName> <PropertyValue>
Any property that exists in the .properties file can be overwritten via this switch. Ex:
-output.handlers LOAD_FILE_TEXT_FORMAT
-export.dimensions Market;Year;Product
After saving any changes, run the .cmd file to run the extraction.
| To run without the .cmd file, the “classes” directory (the directory itself) and all .jar files in the “lib” directory must be in the class-path (this should already be done via the MANIFEST.MF file, but just as a note) |
Run via Step-by-step Wizard (GUI)
To start the Next Generation Outline Extractor GUI, double-click on the gui-olapunderground-outline-extractor.cmd file. If the program starts up, then the JRE and the Next Generation Outline Extractor are properly installed and ready to use.
If a JRE has been installed and there is an error message about the JRE_HOME or JAVA_HOME environment variables not being set, then one of those variables must be set in the .cmd file used to run the extractor.
1. Open the .cmd file in Notepad or Notepad++
2. Locate this line at the top of the file (should be line number 5):
rem set JAVA_HOME=<java directory>
3. Replace <java directory> with the path (using ‘\’ as path separator) to Java’s installation directory
4. Remove the rem so that the line looks similar (possibly different version) to this:
set JAVA_HOME=C:\Program Files (x86)\jre1.7.0_25
5. Save the file
Attempt to run the Next Generation Outline Extractor again, if the same error occurs, restart the computer and try again. If it still occurs after a restart, check to make sure that the JRE_HOME variable points to a valid directory
Start
The Start page offers 3 options for running an extraction: Start a new one, open an existing extraction file, or load recently opened extraction file.

Create New Extract - Runs through the wizard to set options for a new extraction
Modify Existing Extract - Open an existing extraction file which will be loaded into this extractor
Open Recent Extract - Similar to ‘Modify Existing Extract’, it lists recently opened files, so they are more easily accessible
Once one of these options is selected, click ‘Next’ to continue configuring the extractor
Login
The Login tab provides the ability to log in to Essbase and to select the cube you want to extract.
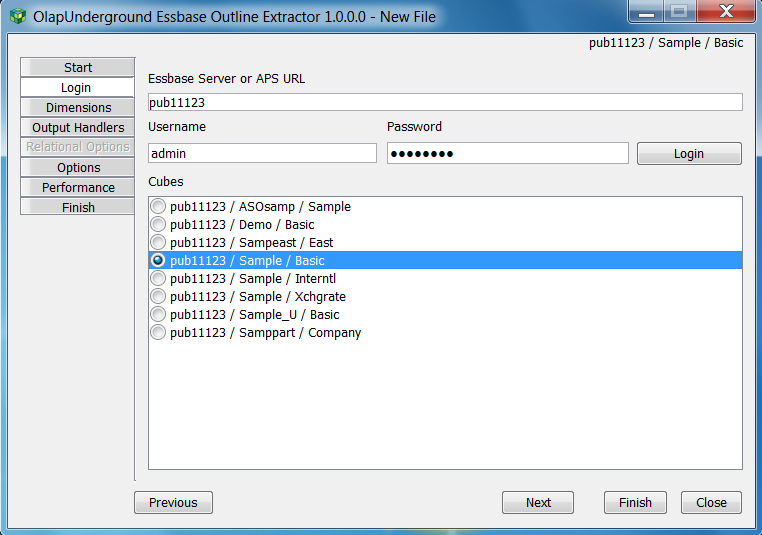
Type in the name of the Essbase server or the URL to Analytic Provider Services
(ex: essbase11123 OR http://esshost:13080/aps/JAPI)
Type in your essbase login credentials in the Username and Password boxes
Click ‘Login’
After logging in successfully, a list of available cubes will appear, and you must select one in order to continue through the GUI.
Click ‘Next’ to continue to the Dimensions tab
Dimensions
The Dimensions tab allows you to select which dimensions will be processed in the outline extraction, and what filters to apply to each dimension (if any)
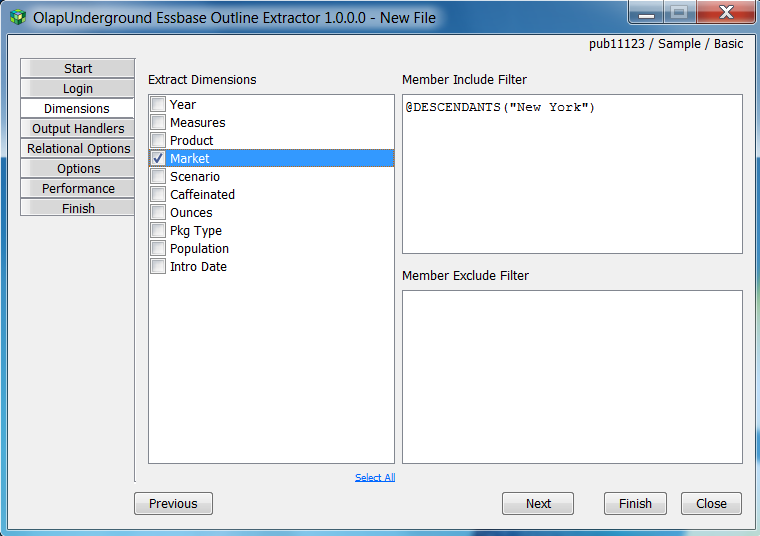
Check each dimension that you wish to include in the extraction. A ‘Select All’ button is available as the blue link below the list.
To apply filters to the selected dimensions, one filter must be applied per line where each line corresponds to a selected dimension. (Ex. in the picture above, @DESCENDANTS(“New York”) applies to ‘Market’). If 2 dimensions were selected, 2 lines would need to be included for the filters. On the other hand, including and excluding will be ignored if either filter’s box is blank (i.e. All members will be included if both boxes are left empty)
The syntax for the filters is the same as the calc style rules

Load File Text Writer
The LoadFile writer outputs Essbase outline information in the format necessary to load into Hyperion Essbase using Essbase load rules.
This writer follows standard csv file rules where strings containing embedded commas are surrounded by double quotes (Seattle, WA → "Seattle, WA"), and double quote characters are delimited with a second double quote character ("Goods Sold" → ""Goods Sold""")
Fast Load File Writer
A faster, slimmer version of the Load File Text Writer. This returns the Parent Name, Member Name, default Alias, Property, Formula, and Attributes.
NOTE: To avoid using excessive ports, de-select the attributes option for this writer.
Level Text Writer
The Level Text Writer outputs Essbase outline member information in the format necessary to load an Essbase outline using Essbase load rules for a level build. (Output is only levels and their aliases)
Generation Text Writer
The Generation Text Writer outputs Essbase outline member information in the format necessary to load an Essbase outline using Essbase load rules for a Generation build.
The output for this writer is only generations and aliases.
Documentation Text Writer
The documentation format provides more descriptive headers to the different values that are brought back from the outline. This writer would be used to look at the data returned as is instead of importing it somewhere else.
Relational Cache Writer
The Relational Cache Writer outputs outline information to a relational database in a fashion that makes it easy to query relevant information without having to go through Essbase. Examples include Oracle, MicrosoftSQL, IBM, MySQL, DB2, or any other type of JDBC compliant database. Once this writer is selected, the Relational Options tab is enabled (See Relational Options below) so that you can specify connection parameters. The Relational Options must be properly configured before extraction
Hyperion Planning 11 Text Writer
The HyperionPlanning11 output format returns Essbase member information in the format necessary for the OutlineLoad utility in Hyperion Planning. The format of the files output by this writer vary by the dimension as documented in the OutlineLoad.cmd documentation.
Options
Each output format has its own options that are set in the Options tab which modify what is extracted in each format
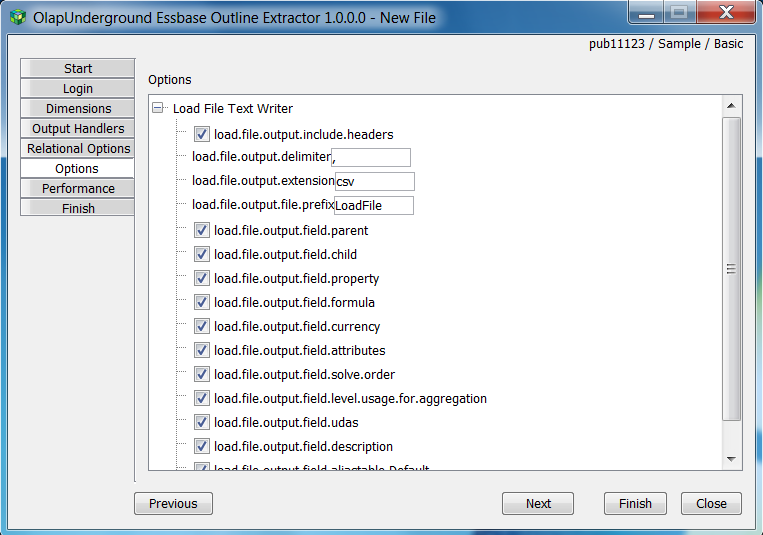
For every output format that is selected in the Output Handlers tab, a new node is added to the Options tab that holds all the available options for that particular output format.
The option names are exactly equivalent to how they appear in the resulting .properties file, and are detailed enough to tell you what they are for. For example:
load.file.output.field.formula - If this is checked, the Load File output format will write Formulas into the output. If it is not checked, formulas will not be written to the output
load.file.output.include.headers - If this is checked, the headers (the first row in the output that provides “column names” for each of the delimited values) will be written. If it is not checked, the header row will be skipped entirely.
load.file.output.delimiter - This is the character that will be used to delimit between values in the Load File output format. By default, it is ‘,’
Performance
The performance settings are related to an ongoing issue in the Essbase Java API: the Essbase Java API uses a new port on the client machine to connect to Essbase each time it requests information. On large outlines, this causes the client machine to quickly run out of available ports, and as a result not be able to talk to Essbase. The settings provided in the Performance tab help alleviate this issue by forcing the extraction to run at a slower rate, allowing the used ports to become available again.
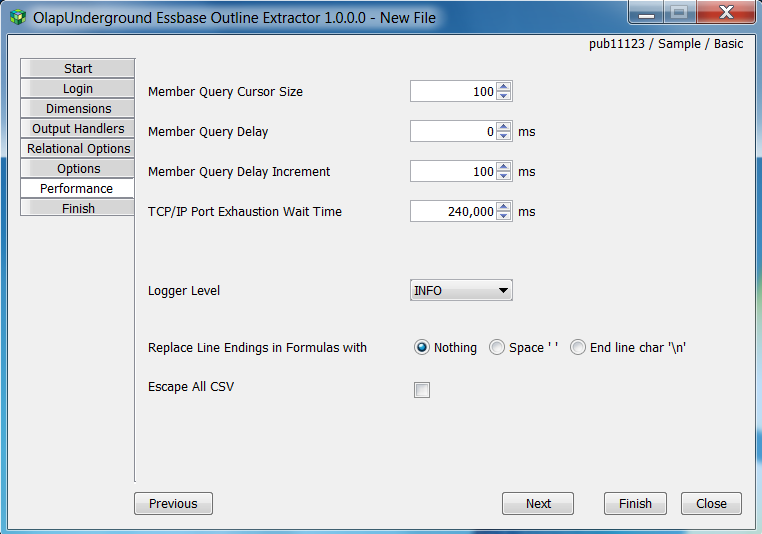
Member Query Cursor Size - Number of members pulled from Essbase in one call to essbase, this typically does not need to be changed unless bandwidth is extremely low.
Member Query Delay - Delay between processing each member. Typically this is the first setting to increase if the extractor runs into port usage issues
Member Query Delay Increment - If the extractor encounters a port usage error (no ports available to connect to Essbase), the Member Query Delay is increased by this amount and the extractor starts again
TCP/IP Port Exhaustion Wait Time - Number of seconds to wait if a port exhaustion error occurs.
240000ms (4 minutes) is the default setting in windows for the amount of time a port will stay in TIMED_WAIT before allowing it to be used again.
Logger Level - The level of logging information that is printed out in the output log
Replace Line Endings in Formulas - This setting affects how end-line characters in formulas are handled. (Recommended: End line char ‘\n’)
Escape All CSV - This setting causes each individual item being output to be CSV-escaped (enclosed with necessary “‘s or escaping characters with \)
Finish
The Finish tab can be accessed at any point during configuration by simply hitting the ‘Finish’ button in the bottom right of the window. The Finish tab is where the current settings can be saved, and/or run as an extraction. It also holds the output window for the extractor’s log console.
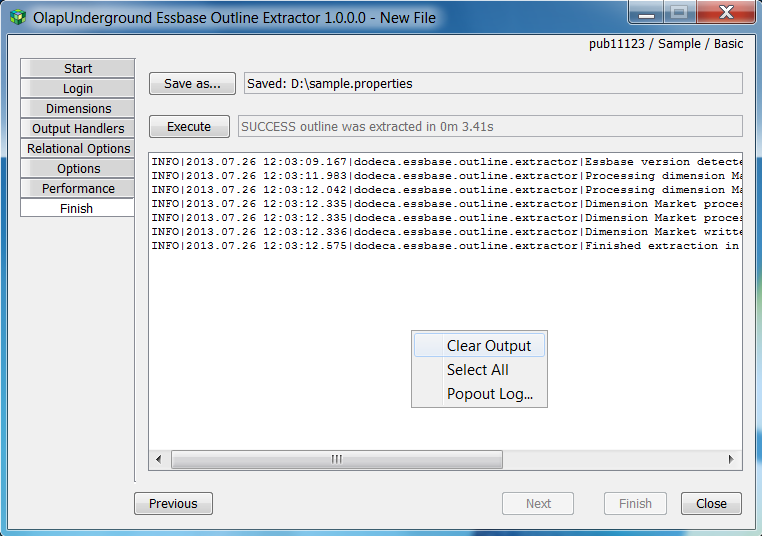
To save the current extraction settings, click ‘Save as…’ and choose a filename and destination folder. This allows the current settings to be loaded again by opening an existing extract file (as seen on the Start tab)
Right-clicking on the output log gives additional options to Clear Output, Select All (so that it may be copied elsewhere), and Popout Log - which opens the log console in a different window.
This is also where the current settings for an extraction are executed. (The settings do not need to be saved to a file in order to execute an extraction)