Creating an Essbase Ad Hoc View
Defining a View
Views are the objects in Dodeca that bring together the numerous types of objects to form the content that end users see. Views typically use a number of different objects including Essbase Connections, Selectors and Selector Lists, Microsoft Excel templates (stored as Binary Artifacts), Toolbar Configurations and Workbook Scripts. Views are exposed to users on a View Hierarchy. This section will discuss creating simple Essbase Ad hoc views and progress to building more complex view types.
The simplest type of view to create is an Essbase Ad hoc view. This view type emulates the freeform Excel Essbase add-in functionality. The exception to this comparison is that, with Dodeca, the administrator controls which Essbase server and database are used by the view.
To create a new Essbase Ad hoc view, follow these steps:
-
Create the new View in the Views metadata editor.
-
Modify relevant properties of the new View and commit the changes.
-
Expose the new View on a View Hierarchy.
-
Test the new View.
Creating a New Ad hoc View Definition
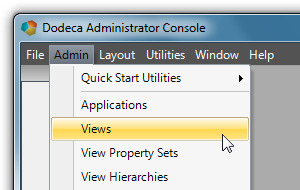
To create a new Ad hoc view in the Views metadata editor, select Admin > Views from the Dodeca menu.
Click New, located in the command buttons area located at the bottom of the metadata list panel.
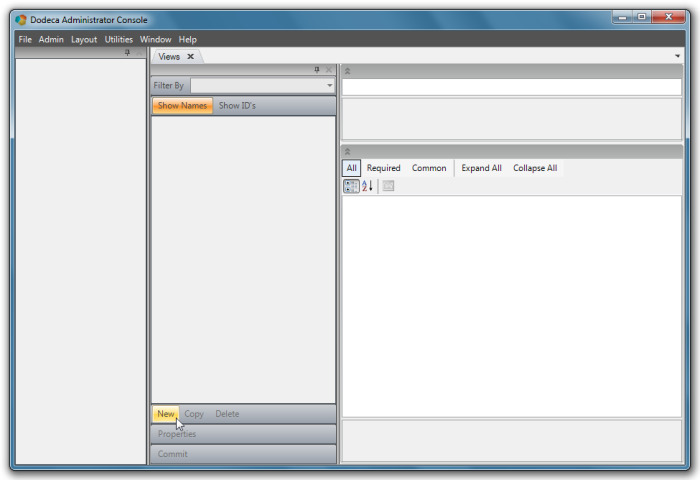
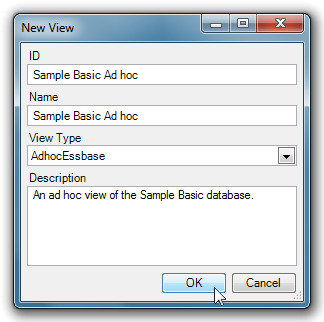
The New View dialog displays.
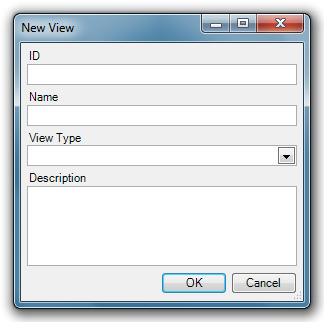
In this dialog, enter the ID and Name of the new view. The ID is the name under which the view is stored in the database and the Name is the friendly name the user sees. It is recommended that the ID and the Name be the same for ease of administration. For example, use Sample Basic Ad hoc for the ID and Name of an ad hoc view that talks to the Sample Basic database.
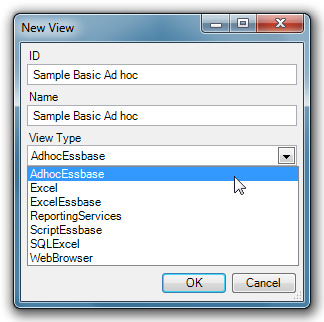
The most important property in this dialog box is the View Type. The View Type defines both the behavior of the view that is created and the number and names of properties that are available to configure the view. For example, the Excel Essbase view type in Dodeca needs more information to build the view than an ad hoc view because it needs to know information about the Excel template used and the ranges where data is to be retrieved into the view.
| The View Types available in the dropdown are part of the Dodeca snap-in extensibility model and may vary in your environment. The snap-in extensibility model provides the ability for customers to write their own View Types that implement specific business rules for their company and snap them into the Dodeca Framework using the Modules metadata editor. |
Finally, the Description field is optional and is used primarily as documentation for the purpose of the view.
To create the view, enter the ID and Name as Sample Basic Ad hoc, choose the View Type AdhocEssbase and optionally, add a Description.
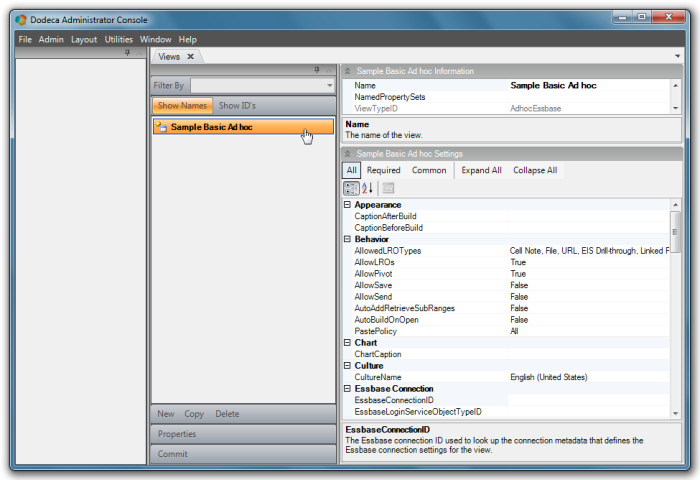
Click OK and the view is added to the metadata list with an icon indicating it has been edited. The new view is also selected and the property grid displays the properties for the new view. The Commit button also becomes enabled.
At this point, the new view exists only in the metadata editor and has not been stored in the Dodeca database. After setting some properties in the next section, we will commit the view to the Dodeca database.
Setting Properties for the New Ad hoc View
To complete the view and make it useful for end users, you must modify some key property values. First, as an Ad hoc view typically doesn’t require the end user to select members for a point of view. It is recommended that you set the AutoBuildOnOpen property, located in the Behavior category, to True. Setting this property to True tells Dodeca to automatically build the view when the view opens. A False setting would require the user to click Build View to perform the initial build.
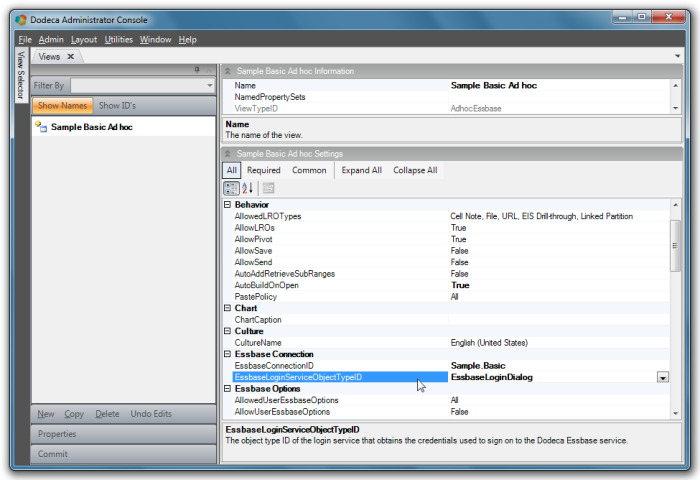
The ad hoc view also needs information about what Essbase database to connect to and how to log in to Essbase. The EssbaseConnectionID property is used to look up the connection metadata that defines the Essbase connection settings for the view. In our example, select the dropdown and choose the connection ID for the Sample Basic database (in the example, essprod01.Sample.Basic).
The EssbaseLoginServiceObjectTypeID property specifies the object type ID of the login service that obtains the credentials used to sign onto the Dodeca Essbase service. This value is required as Dodeca has no hard-coded methodology for logging into Essbase but rather uses snap-in services architecture in order to accommodate nearly any requirement a company may have for authenticating user credentials in Essbase. Dodeca ships with one login service, the EssbaseLoginDialog service, which prompts the user for a username and password that is then validated against Essbase.
The Essbase Options category has a number of properties that are often changed. The properties in the Essbase Options category control whether the user gets to change any of their Essbase options and, if so, which options they get to change. Further, the administrator can control any properties the user isn’t allowed to change.
Because this is an Ad hoc view, typically the user is able to control at least some of the available Essbase options. Set the AllowUserEssbaseOption property to True to allow the user to control the Essbase options. When this property is set to True, the Essbase Options button on the Essbase toolbars is enabled and when it is clicked, the Essbase Options dialog displays.
There are some Essbase Options that are better controlled by the system administrator. Dodeca allows administrators to configure the Essbase Options dialog in order to include or exclude only the Essbase Options they want users to see. The AllowedUserEssbaseOptions property controls the options displayed in the Essbase Options dialog. For example, if the Essbase database is not using Dynamic Time Series functionality, the option to choose Dynamic Time Series related properties can be removed from the Allowed User Essbase Options dialog. Another use for this property is to standardize properties such as the Missing Label and the No Access Label to provide consistency for users.
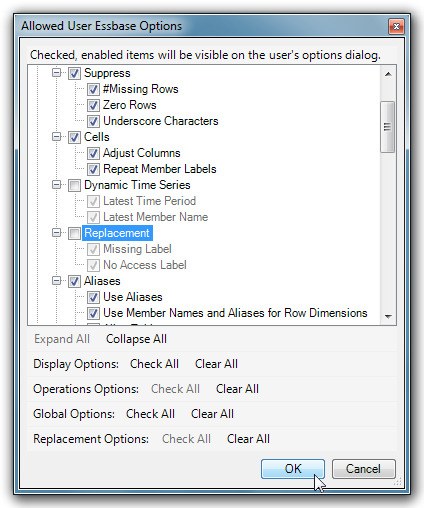
To configure the properties that are available, click the dropdown for the AllowedUserEssbaseOptions property and a version of the Essbase Options dialog displays with a check box next to each item in the dialog. Uncheck the check box next to any items that should not be displayed to the user. At runtime, the Essbase Options dialog will not contain those options.
The diagram shows what the dialog will look like after the Dynamic Time Series and Replacement categories have been unchecked.
Click OK to save the property changes.
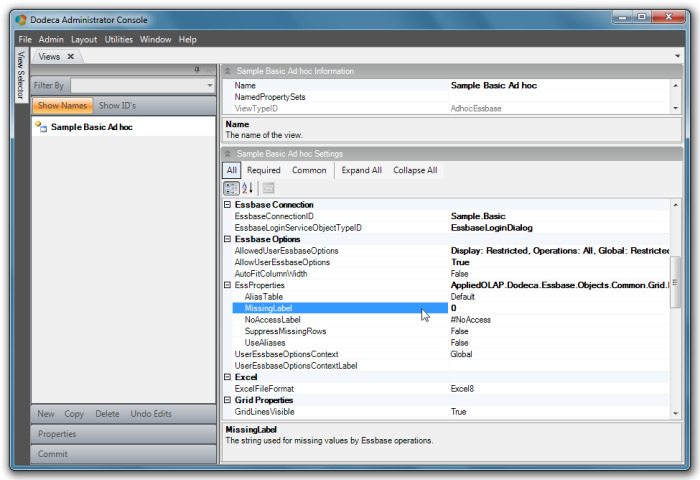
In this example, the Missing Label has been suppressed from the Essbase Options dialog. When a property value is suppressed, the administrator has absolute control over the property value used at runtime. In the property grid, locate the MissingLabel property and set its value to 0.
| Unlike the Essbase Excel add-in, the MissingLabel is replaced with a numeric zero. |
The following diagram displays the Essbase Options category:
Scroll down to the UI category to see the final properties that need to change for the ad hoc view. The UI category contains information about the menus, toolbars and display controls for the view.
The most important property in this category is the WindowsViewUIObjectTypeID. This property is the object type of the Windows form that contains the user interface controls used to display the view data. Due to the snap-in architecture of Dodeca, the view does not have a hard-coded value for the display controls but rather a configurable value. Further, you can expand this object type via the Dodeca extensibility model to implement customer-specific business rules. For our Ad hoc view, choose the WorkbookView object type to display the data in a spreadsheet control.
Toolbar configurations in Dodeca are configurable as metadata in the Toolbars Configurations metadata editor. Because toolbar configurations are metadata, they are completely controllable within the Dodeca environment. The Dodeca Metadata Starter Kit contains several toolbar configurations. There are two main toolbar properties that are normally configured in a view.
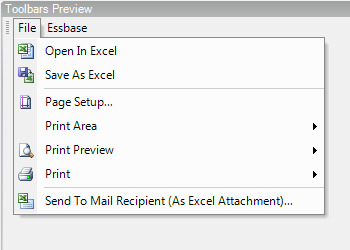
The first of the toolbar properties in the property grid is the MergeableToolbarsConfigurationID. This toolbar definition defines the view specific toolbar and menu items that are merged with the application level toolbar and menus. Choose the toolbars configuration named Essbase View Main All for the ad hoc view. In the Toolbar Preview shown below, the first view shows additional menu items on the File menu and the second shows the Essbase tools.
The second toolbar property, the ViewToolbarsConfigurationID, defines the view-specific toolbar and menus that are displayed within the view window itself. For this property, choose the toolbars configuration named Essbase View Standard All. This toolbar contains view level tools including various Essbase operation tools.

The UI category is now complete.

At this point, the basic configuration of the ad hoc view is complete. Click Commit to save the changes to the Dodeca metadata database and then close the Views metadata editor.
Exposing the Ad hoc View to Users in a View Hierarchy
The final step to expose the view to users is to place it on one or more view hierarchies. To place the view on a view hierarchy, first open the View Hierarchies metadata editor from the Admin menu.

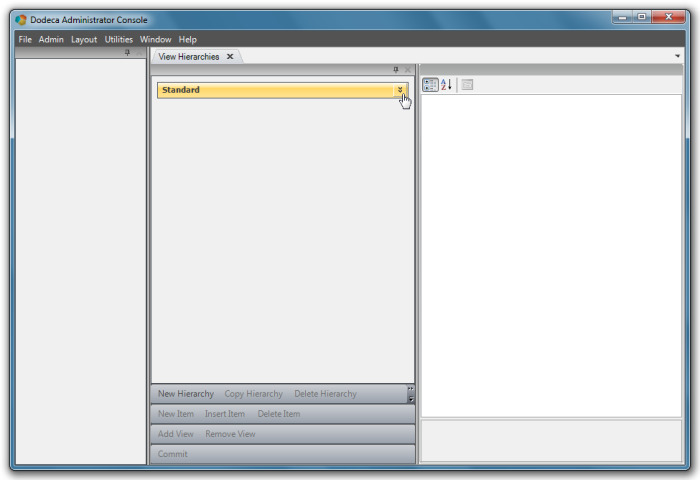
The View Hierarchies metadata editor will open and show the hierarchies currently in the system. In the graphic below, the Standard hierarchy is the only one present in the system.
When the metadata editor opens, the hierarchies are displayed collapsed. Click the down arrow expansion icon in the upper right hand corner of the hierarchy to expand it open.
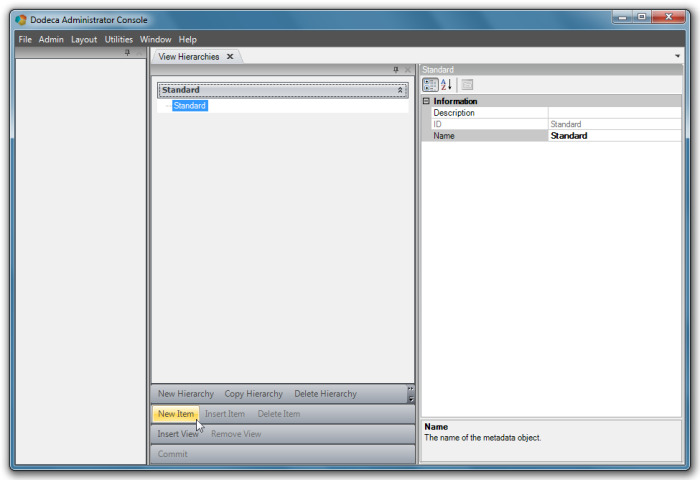
Once the hierarchy is open, the items in the hierarchy will be displayed and additional command buttons will become enabled.
There are two different types of items that can be added to a hierarchy; categories and views. Category Items are used for grouping the views appearing in the Hierarchy, allowing views to be added as “children” to the category items (left column in below diagram). A category can also be grouped with a category as a sub-category with views added to it (right column in below diagram).

To add a category, press the New Item button.
Type in the ID and Name for the new item.
Note that the Item Object Type defaults to Category. The Item Object Type is another type of object that may be customized via the Dodeca extensibility model; Dodeca ships with the Category Item Object Type.

Click OK to add the new category.
The Ad hoc Views category will now display in the View Hierarchies list.

Now that the category has been added, a view can be added to the category.
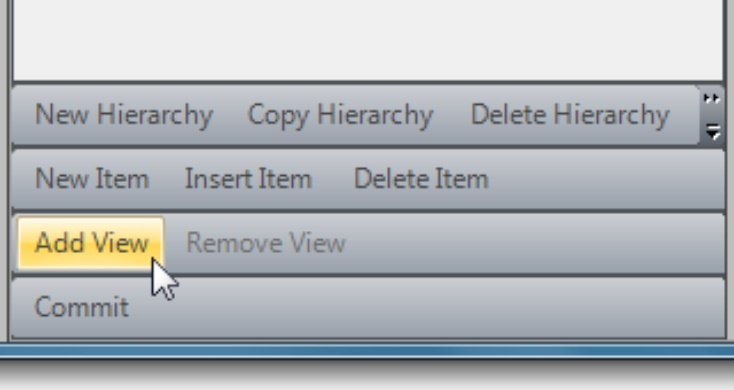
To add a view, click the Add View button.
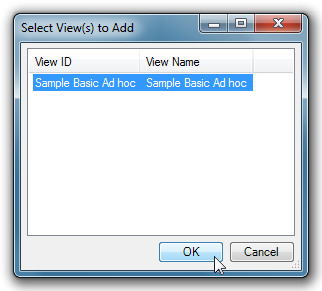
The Select View(s) to Add dialog will be displayed.
Select the Sample Basic Ad hoc view and click OK.
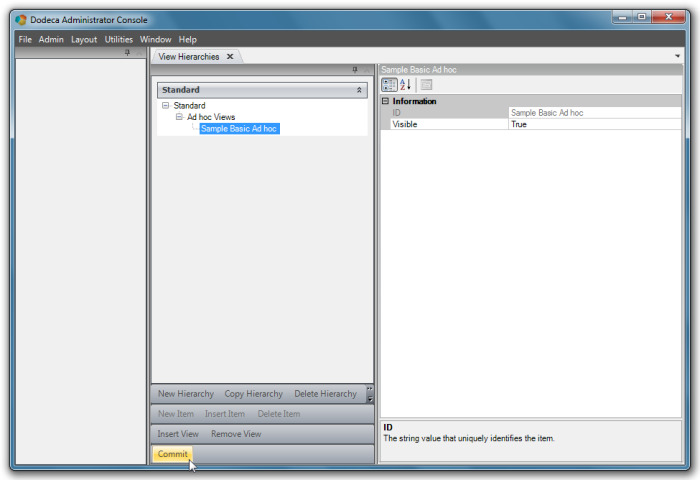
The dialog closes and the selected view is added to the hierarchy.
Click Commit button to save the hierarchy to the metadata database and close the View Hierarchies metadata editor.
Testing the New Ad Hoc View
Test the new view by right-clicking on the View Selector and selecting Refresh from the context menu.
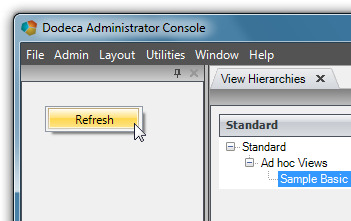
The Refresh button forces the hierarchy metadata to be re-read from the server and updates the display to show the newly updated hierarchy.
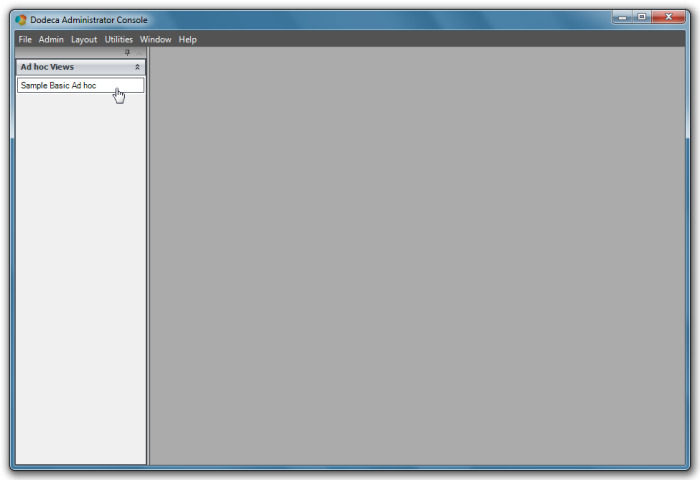
Click on the new view to launch it. During the launch process, Dodeca queries the metadata database for all of the metadata required to create and run the view. In the case of an ad hoc report, Dodeca will request metadata for the view definition, the Essbase connection and the toolbars configurations objects used in the view.
An Essbase login dialog displays (as provided by the EssbaseLoginDialog specified in the EssbaseLoginServiceObjectTypeID property configured earlier).
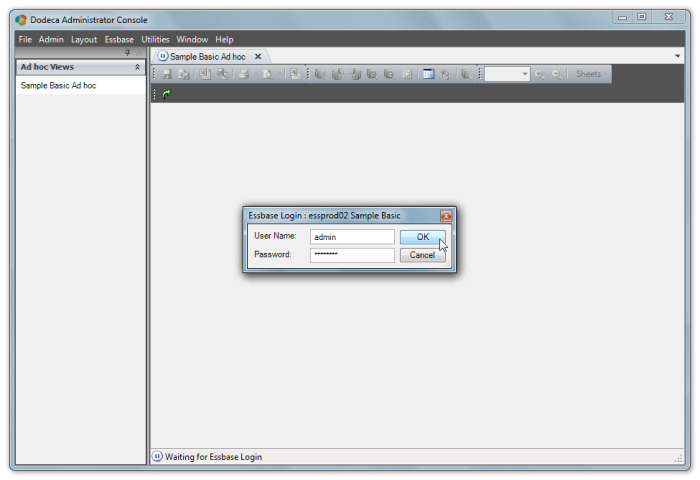
Enter a valid Essbase username and password and click OK or press the Enter key.
The view will connect to the Sample Basic database, as specified in the configuration, and return the default top-of-dimension Essbase retrieval.
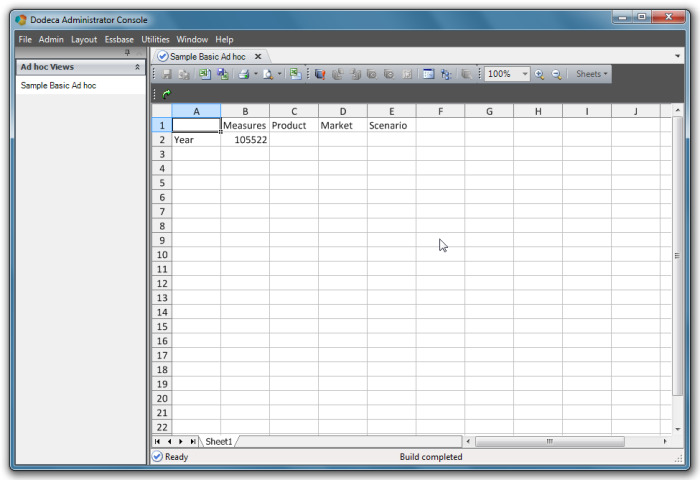
The simple ad hoc view is complete. To review, the creation of the new Essbase Ad hoc view followed these steps:
-
Created the new view in the Views metadata editor.
-
Modified relevant properties of the new View and commit the changes.
-
Exposed the new View on a View Hierarchy.
-
Tested the new View.
The next section will expand on the steps taken in the ad hoc view and will introduce the concept of using Microsoft Excel to create templates for Dodeca views.