Creating an Essbase Excel View
The use of Microsoft Excel templates with Essbase roots dates back to the very early days of Essbase when Microsoft Excel was the only interface to the data. Since that time, there have been many user interface products Hyperion/Oracle and their partners have introduced, but despite that fact, many companies continue to rely on the Essbase Excel add-in for much of their reporting. Further, many companies have written complex VBA-based applications to serve the needs of their users.
The problems with VBA-based applications are numerous. The functionality exposed to the users is often limited due to the skills of the developer.The testing and reliability of the applications are also suspect due to the limited resources available to the developers to test and support the applications. Dodeca was designed to easily replace the Essbase Excel add-in and the applications that customers built using the add-in.Much of the functionality that was custom built by many Essbase customers is built into Dodeca.
Often, custom VBA applications customers build seek to guide users by automatically selecting the Microsoft Excel template, the database connection or connections, and sets up selection boxes to select the point of view. In Dodeca, this functionality is built in.
To create a new Essbase Excel view, it will be necessary follow these general steps:
-
Create the Microsoft Excel template for the view.
-
Create the new view in the Views metadata editor.
-
Modify relevant properties of the new view and commit the changes.
-
Expose the new view on a View Hierarchy.
The most obvious difference between creating an ad hoc view and creating an Excel Essbase view in Dodeca is that the Excel Essbase view has a Microsoft Excel template. There are other significant differences to be considered. Typical Essbase Excel views are tokenized to allow user selections to be placed into the template at runtime. When views are tokenized, Selectors are configured to allow the user to select the point of view in which they are interested. If there is extraneous text on the template, range names must be placed into the Excel template to indicate where the Essbase data range or ranges are located. Dodeca must be configured to limit the Essbase operations to the indicated retrieve range or ranges.
Essbase Query by Example Basics
Microsoft Excel templates must conform to typical Essbase retrieval layouts to be retrievable using the standard Essbase Query By Example (”QBE”) paradigm. QBE is a very powerful concept as it makes it very easy for business users to lay out a Microsoft Excel worksheet which places data into the format they need. QBE templates are created by typing the Essbase member names into the worksheet in a specific manner. You need to be familiar with the rules QBE follows before creating a Microsoft Excel template. Here are some basic Essbase retrieval rules and terminology used in this guide:
-
One retrieval range per sheet is allowed.
-
Each worksheet may only be connected to one Essbase database at a time.
-
All dimensions in the database must be represented or any missing dimensions are inserted automatically.
-
At least one Essbase dimension must be represented in row orientation.
-
No extraneous text is allowed that may be confused with Essbase member name.
-
Numeric member names must be preceded with a single quote to make them look like text rather than numbers.
| Information about removing some of these limitations in Dodeca is available later in this section. |
Consider the following simple Essbase retrieval in Microsoft Excel from the Sample Basic database which contains five dimensions. In this example, three dimensions are oriented in page orientation, one dimension is oriented in column orientation and one dimension is oriented in row orientation. Collectively, dimensions in an orientation are often referred to as fields as in Page Fields, Column Fields and Row Fields.
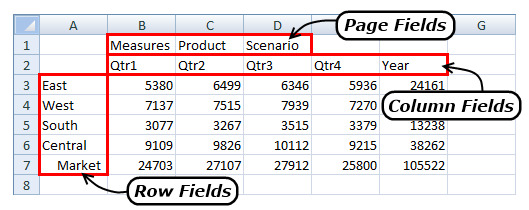
When the Essbase engine parses the grid, it looks at the cells selected in the worksheet, and if no cells are selected, looks at the entire used range of the worksheet. While performing the parsing operation, it looks for members from each dimension in the connected database and follows these rules:
-
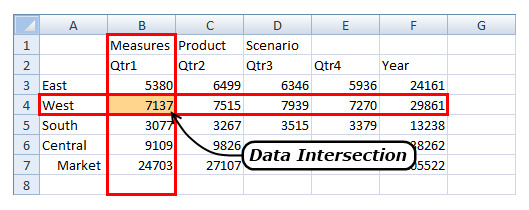
At least one dimension must be represented in row orientation. The reason for this is that Essbase returns data at the data intersections represented by a member in each dimension. If no dimension is represented in Row orientation, then it is impossible to have an intersection represented.
-
The cell intersection depicted here is the intersection of the West, Qtr1, Scenario, Product and Measures members from the Market, Year, Scenario, Product and Measures dimensions, respectively.
-
Multiple members in any single column must be from the same dimension unless the Use Both Members and Alias option is selected. In that case, the multiple members from a group of two adjacent columns must be from the same dimension. Members in this orientation are referred to as Row Fields as they form the row headers for the data retrieval.
-
Multiple members in any single row must be from the same dimension if there is more than one member from that dimension represented on the grid. These members are referred to as Column Fields as they form the column headers for the data retrieval.
-
Dimensions that contain only a single member may appear in any cell above and to the left of the first data cell as long as they don’t appear in any row or column used by the Row Fields or Column Fields. These dimensions effectively act as filters for the data retrieval and are referred to as Page Fields.
Extraneous text may appear within the retrieval as long as it doesn’t resemble an Essbase member name. If Essbase confuses the text with a member name, the parsing algorithm used in the QBE query engine will get confused and will return a Member Out of Place error. Similarly, if a numeric member name is not entered as text by pre-pending the member name with a single quote, the parsing engine will get confused and return a Data item found before member error.
Determining the members represented at data intersections, or data points, in Essbase is generally very easy to understand. That being said, there are some potentially confusing layouts that bear some discussion.
The data intersection depicted in the graphic above shows a block header layout that clearly represents all dimensions in the row and column of the data intersection itself. Sometimes, however, the intersection is not so clear.
These cases can be best illustrated by examples.
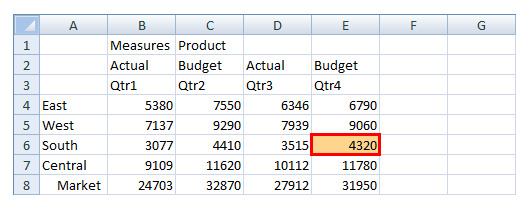
What members are represented at this data point? Looking left from the data point, it is clear that South is the member that represents the Market dimension. Looking up from the data point, it is also clear that Qtr4 represents the Years dimension and Budget represents the Scenario dimension. However, the row and column have no members representing the Measures and Product dimensions. Page Fields represent the entire retrieval and thus Measures and Product represent the members from their dimensions regardless of their position on the grid.
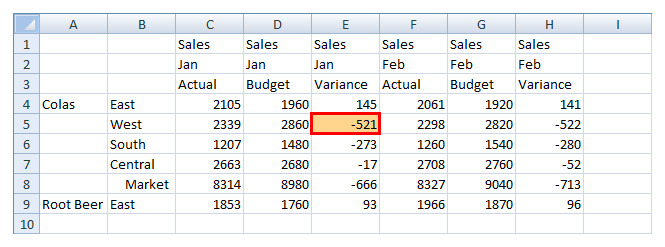
Now, consider this layout and try to determine the members for the indicated data point.
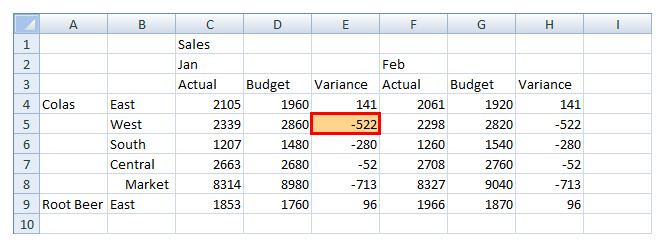
In this case, the members West and Variance are the only two members in the row and column of the data point, so those two members are easy. Further, Sales is the only member from the Measures dimension and thus is a page field; it is automatically included. But what about the members from the Product and Year dimensions? The rules for those dimensions get a little more involved and are made more difficult. One reason it is so difficult is the rules for determining data point members for row and column fields are a bit inconsistent. The rules are:
-
If the dimension is in row orientation, follow the row left to the column containing the dimension. If that cell does not contain a member, then look up through the rows in that column to find the first member. In the example above, look left to column ‘A’, then up to row ‘4’. That cell contains the member name Colas and thus Colas is the member for the Market dimension. Members in row orientation are very consistent and easy to determine; the same is not true for the columns.
-
If the dimension is in column orientation, follow the column up to the row containing the dimension. If that cell does not contain a member, first look one cell to the left in that row for a member. If that cell does not contain a member, look one cell to the right from the original column. If that cell does not contain a member, look two cells to the left from the original column. Continue this pattern until you find a member. In the example above, the cell F2 contains the member name Feb which represents the Years dimension in the data point.
This inconsistency can easily cause confusion with its ambiguous layout. Fortunately, there is an easy way to resolve it via the use of block headers. Block headers explicitly list the members for each intersection in each row and column. Below is the confusing grid shown above after being converted to use block headers. Note the correct variance is now retrieved in the indicated data point.
There is anecdotal evidence that an Essbase retrieve using block headers performs slightly slower than one not using block headers (i.e. pyramid headers). However, the risk of a user relying on an incorrect interpretation of the numbers is a huge price to pay for a slight performance improvement.
Dodeca leverages the power and reduces the limitations of QBE. Dodeca removes or minimizes the effects of the following limitations because:
-
More than one retrieval range per sheet is allowed.
-
Each worksheet may retrieve data from multiple Essbase databases.
-
Extraneous text is ignored due to the usage of retrieval ranges.
Dodeca allows the implementation of multiple retrieval ranges per worksheet. This is achieved by the use of reserved range names in the worksheet that are used to limit the scope of the cells that are subject to the Essbase retrieval process. In the Essbase Excel add-in, multiple retrievals require users manually select the retrieval range before retrieving data. Alternatively, multiple retrievals may be automated in the Essbase Excel add-in by writing VBA code to retrieve each range. The ability to retrieve into multiple ranges in Dodeca is built into the system and requires no special actions by an end user to work properly.
Each reserved range name in Dodeca has a optional corresponding reserved range name to indicate the Essbase Connection to use for each retrieval range. This gives Dodeca the flexibility to retrieve data from one or more Essbase databases into a single worksheet or workbook quickly and easily. A workbook or worksheet may have as many retrieval ranges as necessary to meet business needs.
| There is an example of one production Dodeca application which has a view with over 250 retrieval ranges in a single workbook. |
Creating an Excel Template
Having reviewed the basics of how Essbase works, it is now possible to create an Excel template that can be used in Dodeca. For this first template, assume the need for a template that allows users to create a quarterly Income Statement view. Further, the user should be able to select the Product, Market and Scenario for the view. To create this template, follow these steps:
-
Create the basic data retrieval using the Essbase Excel add-in.
-
Add some appropriate titles and formatting to the template.
-
Tokenize the template to allow users to select a point of view.
-
Add a retrieval range name.
-
Cleanup the template and do some final preparations.
Creating the Basic Data Retrieval
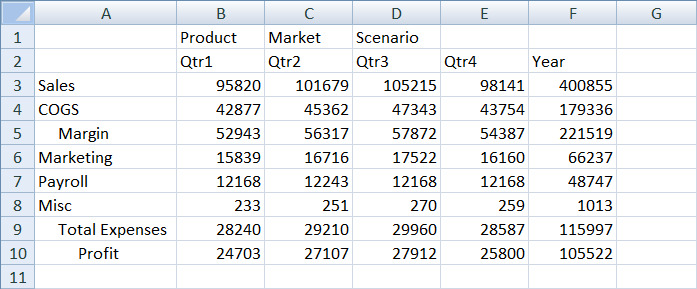
To start, create a new worksheet in Microsoft Excel, connect to the Essbase Sample Basic database and drill/pivot the data to produce a worksheet that looks like this:
Adding Titles and Formatting
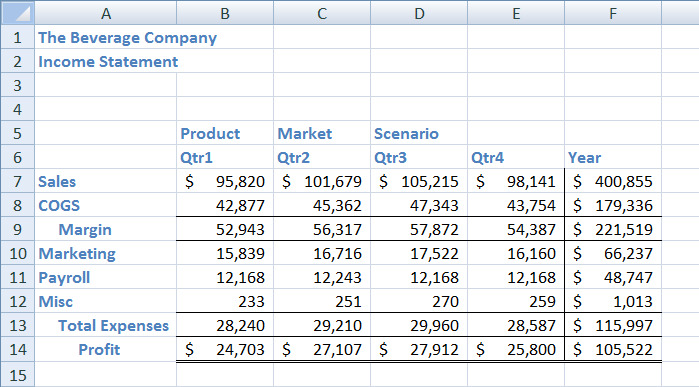
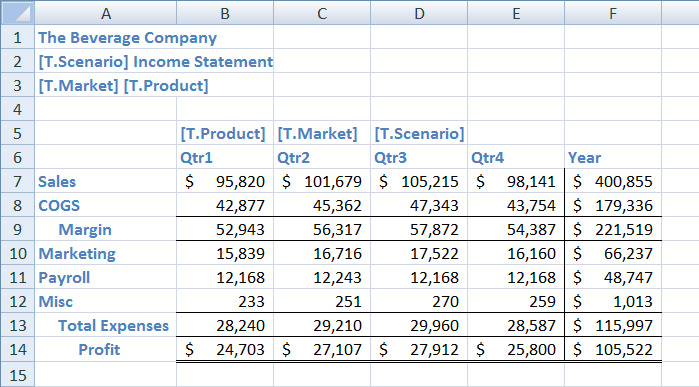
From here, add some nice looking headers and formatting. Virtually any formatting functionality available in Excel can be used and properly rendered within the Dodeca environment. Further, it is possible to use Excel conditional formatting and formulas to add business logic to your template. For this simple Excel template, add a few rows to accommodate a title, add some fonts to the titles, format the numbers and add some subtotal and total lines. The formatted template may now look like the template below.
Tokenizing the Template To Facilitate User Selections
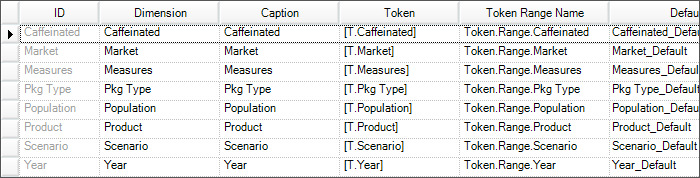
Selectors and the tokens associated with the selectors were created in an earlier step. As a refresher, here are the selectors created earlier and the associated tokens. It is possible to now use those tokens in our Excel template to replace values selected by users into the template at runtime. In the template, we have the Product, Market and Scenario dimensions oriented as Page Fields. Page Fields are excellent candidates to be tokenized.
In the Essbase Selectors editor, shown on the following page, we can see the corresponding tokens for those dimensions are [T.Product], [T.Market] and [T.Scenario].
Tokens have a specific format; ‘[T.’ followed by the dimension name which, in turn, is followed by ‘]’. The reason for the square brackets and ‘T.’, which is an abbreviation for ‘Token.’ is that tokens must be unique strings that may be replaced in a worksheet, calc script, etc. Surrounding the dimension name with these prefixes virtually guarantees uniqueness within the string. A user also has the ability, in Dodeca, to use a different convention, such as surrounding the dimension name with dollar signs as in $$Product$$. The key is that the string comprising the token is unique and will not be confused with any possible valid string in the worksheet, calc script, etc where the token may be used.
Replacing Essbase members in the retrieval range is not the only place that tokens are found in a worksheet. It is possible to find them in many places in a worksheet as illustrated in the diagram below. Here tokens are used in both the retrieval range and the titles.
Adding a Retrieval Range to the Template
Adding tokens to the title of the template could potentially confuse the Essbase QBE engine when it parses the spreadsheet. Adding a retrieval range eliminates the potential confusion of the title being mistaken for retrieve data.
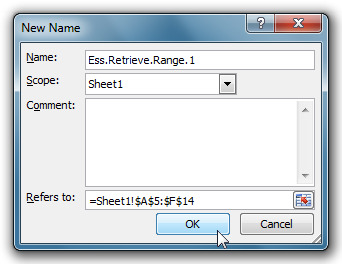
Dodeca uses defined names in the Microsoft Excel template to indicate retrieval ranges. The range name is in the format Ess.Retrieve.Range.x where x is a number. There can be additional range names in Dodeca by adding additional ranges. For example, if there are two separate retrieve range names required on a worksheet in Dodeca, use the range names Ess.Retrieve.Range.1 and Ess.Retrieve.Range.2 to define them.
| The range names are not guaranteed to be retrieved in numeric sequence. |
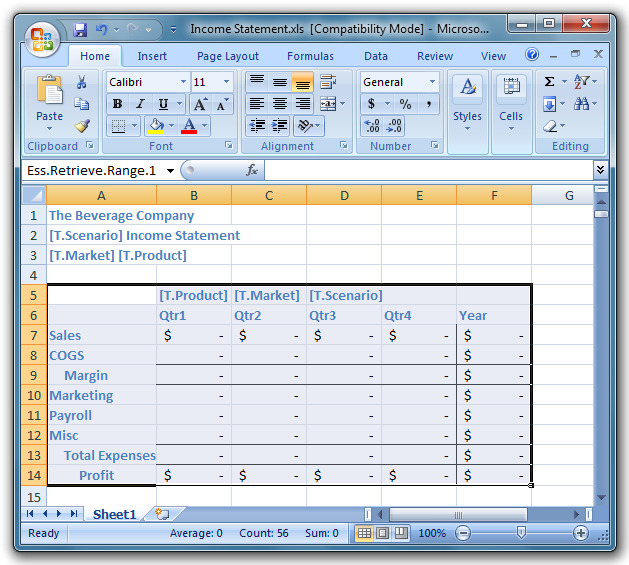
To add a retrieve range to the sample template, select cells A5 through F14 and select
Insert > Name > Define from the Microsoft Excel menu. Type in the name Ess.Retrieve.Range.1 and click Add.
| The most common error that occurs when building templates is misspelling the range name. Remember that "i" comes before "e" in "Retrieve!" |
Finalizing the Template
At this point, the template is nearly complete and would work in Dodeca, but Applied OLAP typically recommends customers follow a couple of general spreadsheet clean-up methods.
-
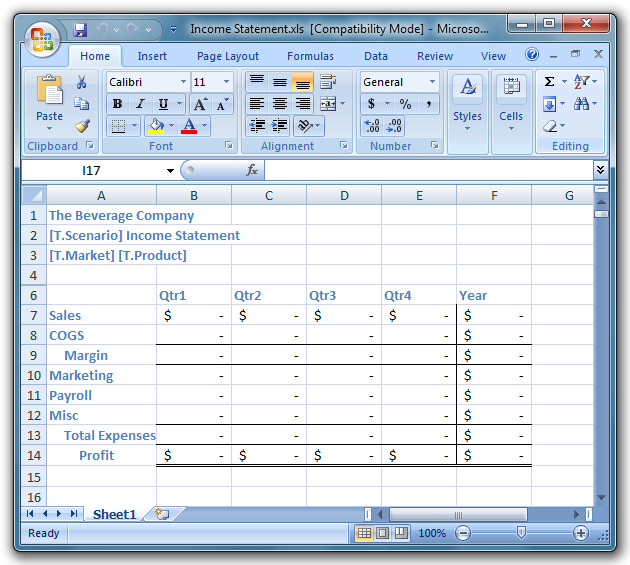
The template currently has existing numbers populating the cells which could possibly be confused with data coming from the database. To clear out the data enter a zero into every cell.
| To enter the same entry into every cell in Excel, select the cells to enter data into, type in the desired data in the first cell then press Control-Enter, and the value populates into every selected cell. |
-
Another clean-up tip for the template is to hide any Essbase header rows and columns that are not necessary in the display. Since the relevant information from the Essbase page fields has been placed into the titles of the spreadsheet, it is no longer necessary for the user to see the page fields to understand the context of the view. In the template, hide row 5 to hide the page fields. As this template has a retrieval range that includes row 5, however, the data from that row will still be included in any Essbase retrieve operation.
-
Lastly, it is also a good idea to delete any unused worksheets from the template.
The Excel template is now complete and is ready to be saved to the hard drive. If there are formulas to protect, Excel’s cell protection can be used to do so. In this example, simply save the template to a file named Income Statement.xls.
Importing the Excel Template into Dodeca as a Binary Artifact
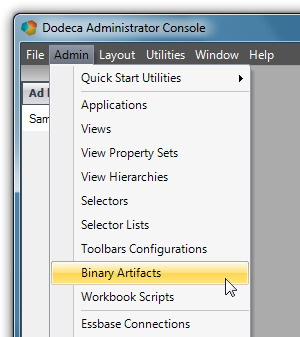
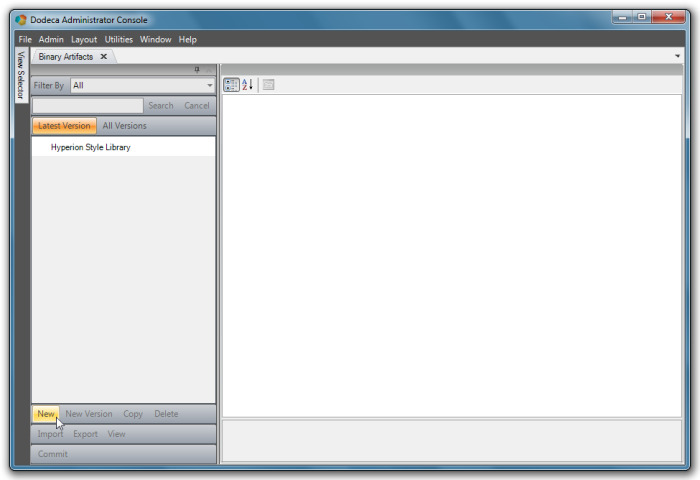
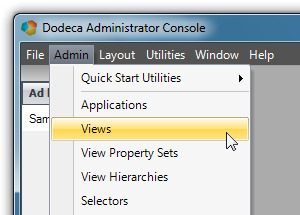
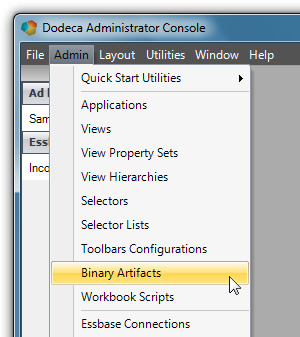
Excel templates in Dodeca are called Binary Artifacts and are stored in the Dodeca metadata database. Binary Artifacts are managed in Dodeca in the Binary Artifacts metadata editor. To import the Excel template into Dodeca select Admin > Binary Artifacts from the menu as shown below.
Once the Binary Artifacts metadata editor opens, click New, located at the bottom of the metadata list panel.
Clicking on the New button launches the New Binary Artifact dialog.
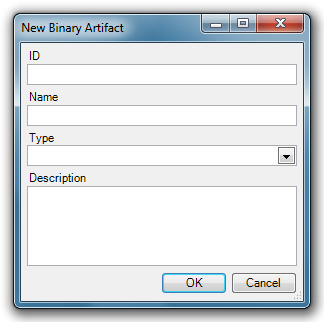
Enter the ID and Name of the new Binary Artifact to create. The ID is the name under which the artifact will be stored in the database and the name is the "friendly" name the administrator will see when using the artifact.
It is recommended that the ID and the Name be the same for ease of administration. In this case, for example, the name Income Statement can be used to reference the Income Statement binary artifact create in this section to hold the Income Statement Excel template.
| The name used in this example is the same name used for the Excel template. The Excel template is not required to be named the same, or even similar, to the binary artifact ID or binary artifact name. |
The Type property, required for this binary artifact is Excel. The Type property is used as a filter in some of the metadata editors so it is quite important to set it properly. Setting the Type to something other than Excel would prevent selecting this binary artifact as the Excel template in the view definition.
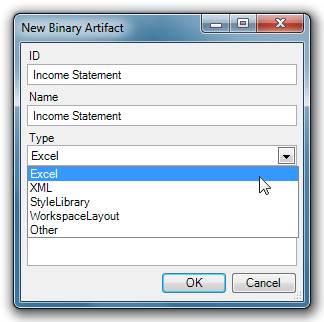
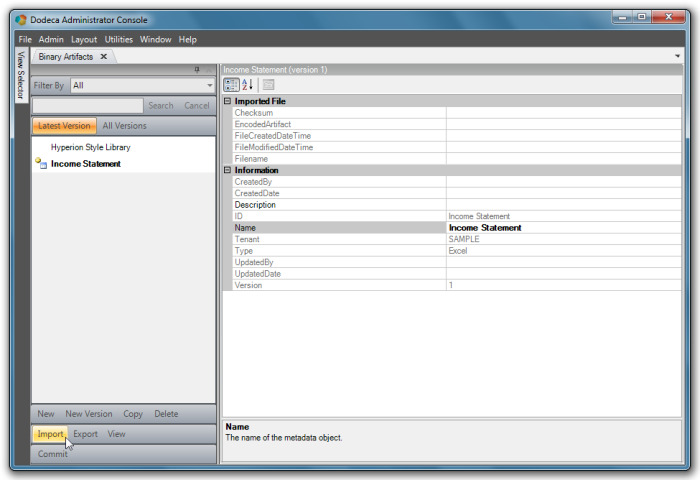
Click OK and the new Binary Artifact object is created.
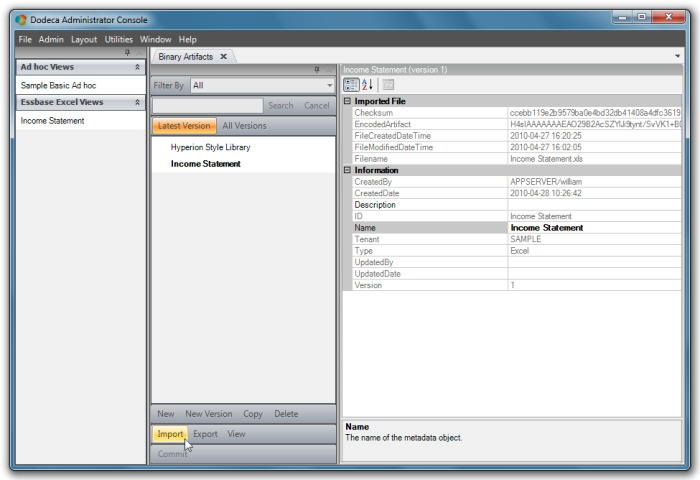
At this point, the shell artifact in which the Excel template will be stored in the Dodeca metadata store has been created. To get this newly created Excel template into the Dodeca database, press the ‘Import’ button located in the command buttons area.
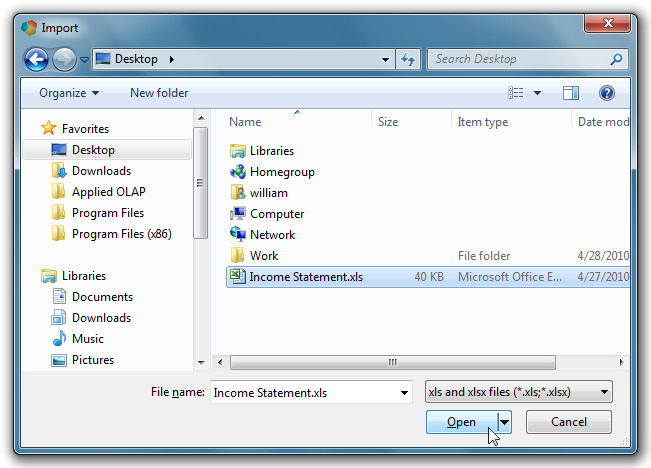
This will prompt a standard Windows File Open dialog. Navigate to your saved Excel template file, select it and press the ‘Open’ button. The Excel template will be imported into the Binary Artifact metadata editor.
The Excel file is imported in an encoded format. Press the ‘Commit’ button and the Binary Artifact, along with its enclosed Excel file, will be saved to the Dodeca metadata store. Once the Binary Artifact has been committed to the metadata store, the Excel file will be available for use in an Excel Essbase view.
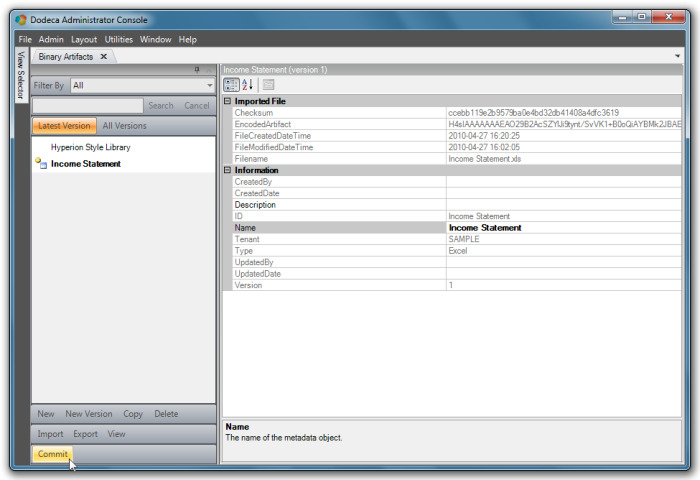
| As part of the patent-pending Dodeca metadata subsystem, all of the metadata editors convert their content to Binary Artifact objects and place their metadata contents into the EncodedArtifact property as encoded XML streams. |
Creating a New Excel Essbase View Definition
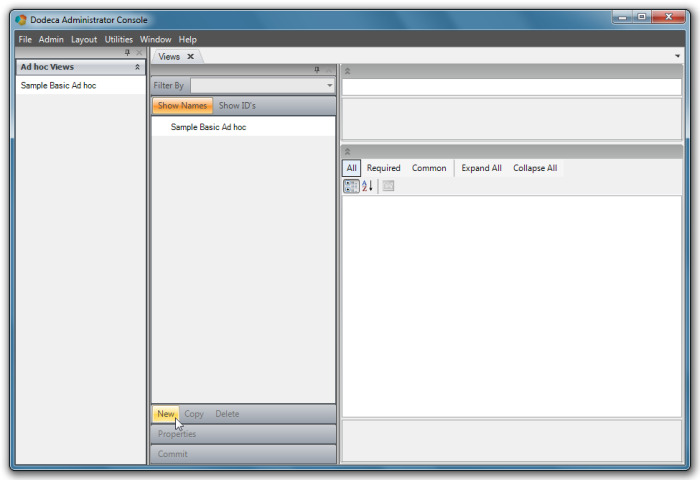
To create a new Excel Essbase view in the Views metadata editor, select Admin > Views.
Once the Views metadata editor opens, click New located in the command buttons area at the bottom of the metadata list panel.
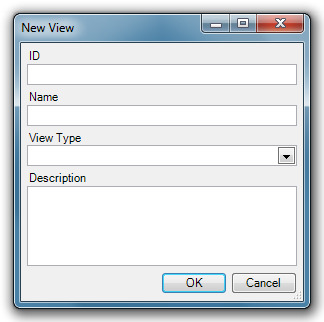
The New View dialog is displayed.
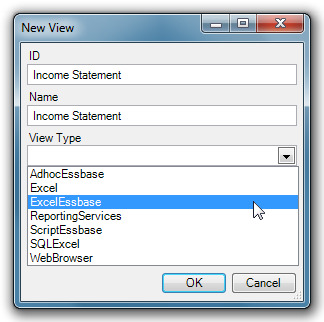
In this dialog, enter the ID and Name of the new view to be created. The ID is the name under which the view is stored in the database and the name is the "friendly" name the user sees. It is recommended that the ID and the Name be the same for ease of administration. In this case, for example, the name Income Statement could be used as we are going to create an Income Statement view.
| The name used in this example coincidentally is the same name used for the Microsoft Excel template. The Microsoft Excel template is not required to be named the same, or even similar, to the view ID or view name. |
The View Type for an Excel Essbase view is ExcelEssbase. This view type is similar in some ways to the AdhocEssbase type but adds properties that are unique to using a Microsoft Excel template in the view.
Click OK and the view is added to the metadata list with an edited icon, the new view is selected, and the property grid shows the properties for the new view. Further, the Commit button becomes enabled. At this point, the new view exists only in the metadata editor and has not been stored in the Dodeca database.
| If you are interested in the programmatic layer underlying Dodeca, the software classes that provide functionality for the AdhocEssbase view type is a base class under the ExcelEssbase view type class. In other words, the ExcelEssbase view type inherits from the AdhocEssbase view type and extends its functionality to allow the use of Excel templates with Essbase. |
Setting Properties for the New Excel Essbase View
To complete the view and make it useful for end users, some key property values must be modified.
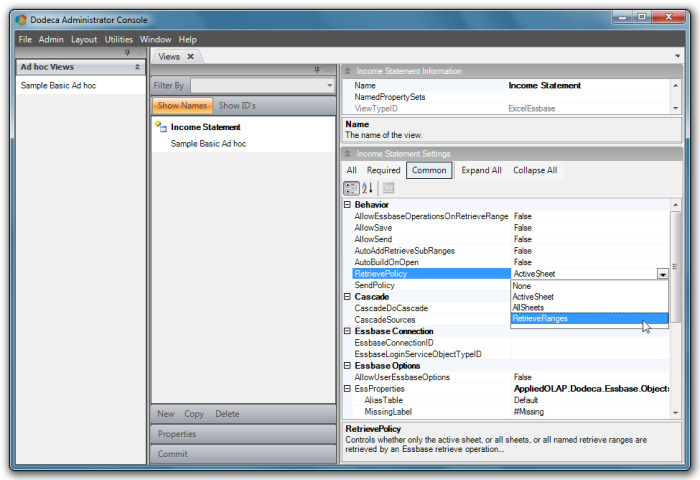
Before we continue, press the 'Common' button at the top of the settings panel to limit the visible settings to those commonly used. The settings now available will be sufficient for our purposes here.

First, as a retrieve range was used in the template, Dodeca needs to be told to look for the retrieve ranges. In the Behavior category, set the RetrievePolicy property to the value RetrieveRanges.
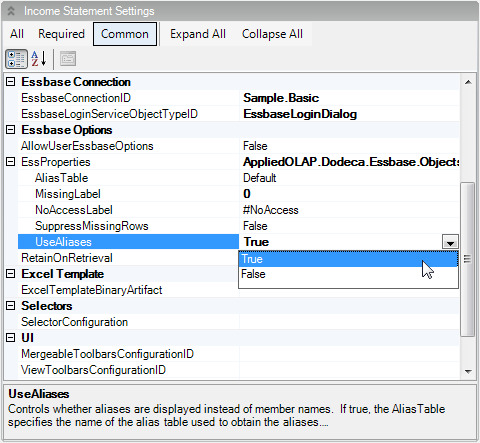
Like the ad hoc view we configured earlier, the Excel Essbase view also needs information about which Essbase database to connect to and how to login into Essbase. Select the EssbaseConnectionID for the Sample Basic database and set the EssbaseLoginServiceObjectTypeID property to use the EssbaseLoginDialog service. Also, in the Essbase Options category, set the MissingLabel property to 0 and the UseAliases property to True.
Scroll down to the Excel Template category. The ExcelTemplateBinaryArtifact property ties the Excel Template you stored earlier as a Binary Artifact object to your Excel Essbase view. To select the template, select the ExcelTemplateBinaryArtifact property, then click the dialog indicator button located at the right side of the property value column as shown below.
When you select this button, the Select Excel Template Binary Artifact dialog displays. In this dialog, select the Microsoft Excel template (Income Statement in the example).
| If the Microsoft Excel template does not appear in the dialog, possible problems are forgetting to set the artifact type to Excel or forgetting to commit changes in the Binary Artifacts metadata editor. |
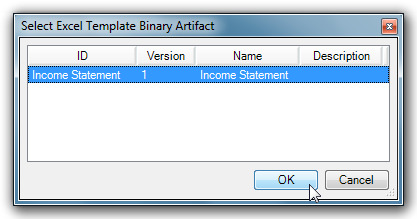
Select the Income Statement version 1 and click OK. The template information is then pulled into the View definition.
| It is possible create multiple versions of the same template in the Binary Artifacts metadata editor and store them in the Dodeca metadata store. It gives the ability to then easily switch between versions in the Views definition form. |
Next, scroll down to the Selectors category and select the SelectorConfiguration property. Again, a dialog indicator button displays.
Click the dialog indicator button and the Configure Selectors dialog displays.
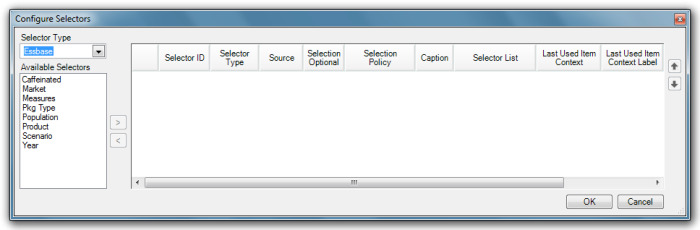
This dialog allows the Administrator to select the Selectors to display for this view along with the Selector Lists that will be used to configure the Selectors. For this view, the Market, Product and Scenario dimensions were tokenized allowing the user to select the values used for those dimensions at runtime. In this form, it is necessary to add selectors for these dimensions.
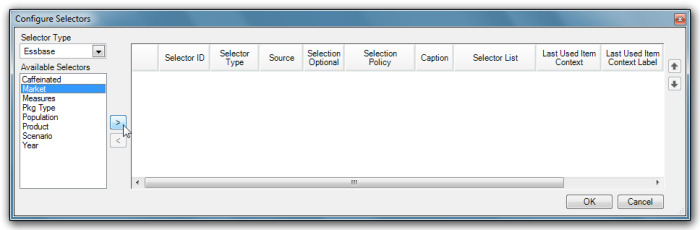
To add a selector, follow these steps:
-
Select the selector from the list on the left side of the dialog.
-
Click the arrow button ( > ) to add the dimension to the list.
-
Optionally configure the properties for the selector.
In this case, select the Market dimension and the arrow button becomes active.
Click the arrow button ( > ) and the Market dimension is added to the Selectors list.
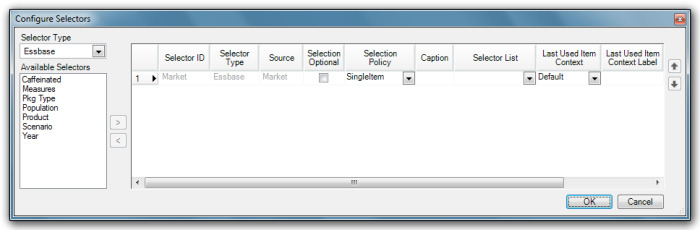
If a Default Selector List for the dimension has not been created, then choosing a Selector List is mandatory. In this case the Selector Lists were imported and they were automatically marked as the default Selector Lists for their respective dimensions, so there is no need for this step.
Repeat this process for the Product and Scenario dimensions and the dialog should look like the one depicted below.
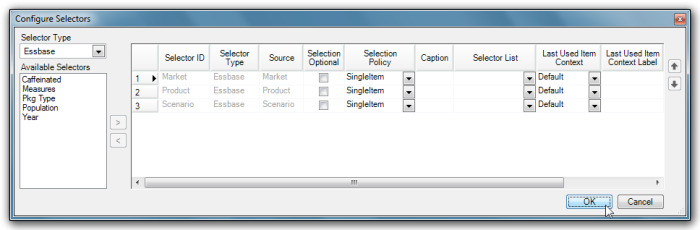
Click OK to complete the Selector configuration.
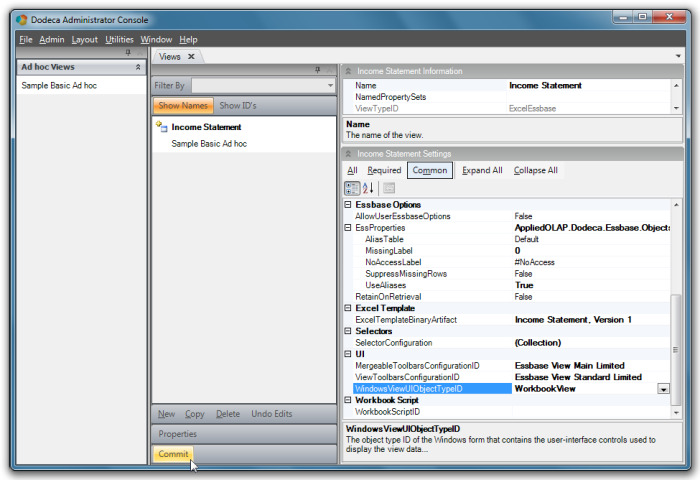
Scroll down to the UI category to see the final properties that require change for this Excel Essbase view. Set the MergeableToolbarsConfigurationID to Essbase View Main Limited, the ViewToolbarsConfigurationID to Essbase View Standard Limited and the WindowsViewUIObjectTypeID to WorkbookView.

The Essbase View Standard Limited toolbars configuration is a similar to the toolbar that was selected for the ad hoc view except that it does not include tools for some Essbase operations such as zooming in, zooming out and pivoting. The user is not authorized to perform those operations on the template that was created, so a different toolbar will be used so those operations are not an option.

The UI category is now complete.
Click Commit to commit the view definition to the Dodeca metadata database and close the Views metadata editor.
Exposing the Essbase Excel View to Users in a View Hierarchy
Just like the Ad hoc view, the final step necessary to expose the view to the user is to place it on one or more view hierarchies. The steps are the same as those used to place the Ad hoc view on a hierarchy:
-
Select Admin > View Hierarchies from the menu.
-
Expand the hierarchy by clicking the down arrow expansion icon.
-
If desired, add a new item (“category”) for the view.
-
Add the view to the category.
-
Click Commit to save the hierarchy to the metadata database.
-
Close the View Hierarchies metadata editor.
Testing the New Essbase Excel View
To test the new Essbase Excel view, right click on the View Selector and select Refresh from the context menu.
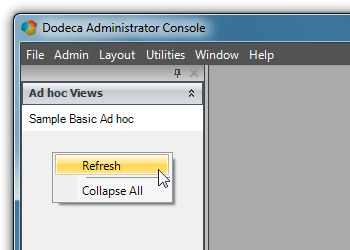
The Refresh button forces a re-read of the hierarchy metadata stored on the server (which, of course, was just modified) and displays the newly updated hierarchy.
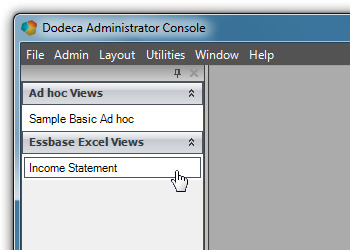
Click on the new view to test it. Dodeca opens the view and allows selections to be made before the view is generated.
Click Open Selector on the Market Selector to choose a Market for your view. Expand the tree-view of Essbase members and select a value for the Market dimension.

Once a selection has been made, the value selected highlights in the tree-view and is also placed into the Selector text box. Repeat the process for all of the other dimensions for which Selectors are displayed.
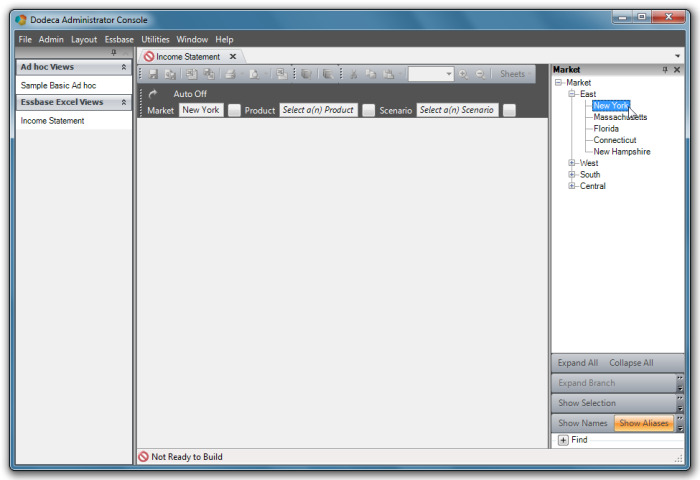
| The Build View button will not become enabled until valid values have been selected for all dimensions. |
Click Build View and the view is generated.
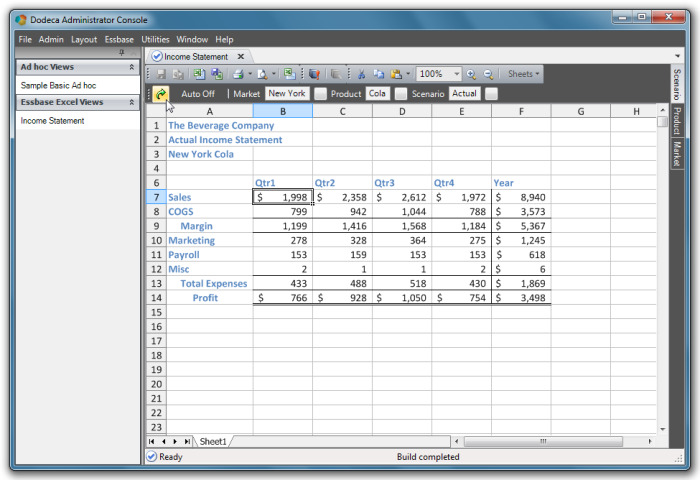
The new Essbase Excel view is now complete and ready to be deployed to users. The same general steps used in creating the Ad hoc view were used to create the Essbase Excel view:
-
Create the Microsoft Excel template for the view.
-
Create the new view in the Views metadata editor.
-
Modify relevant properties of the new View and commit the changes.
-
Expose the new View on a View Hierarchy.
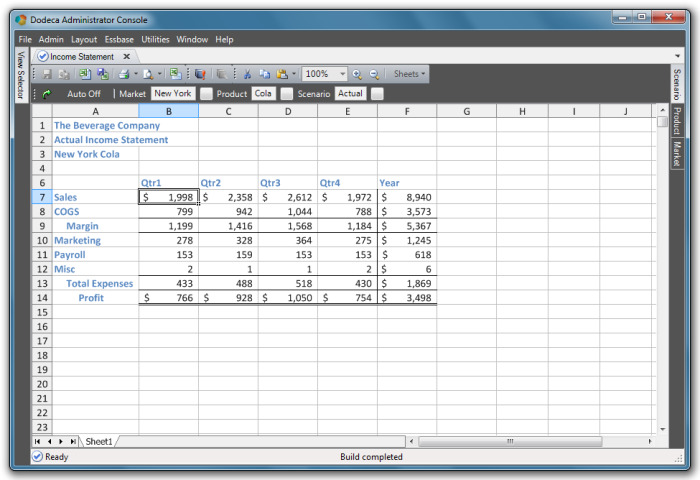
To gain more screen real estate, unpin the selector panels.
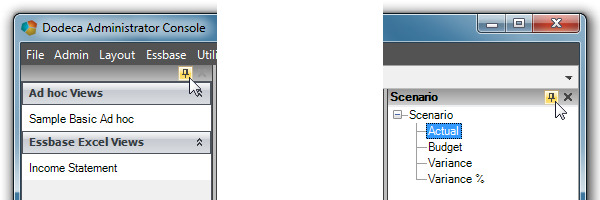
Unpinning the selectors causes them to collapse into the border of the window. To show the selector, move the mouse pointer over the collapsed window and the window expands open and allows selections to be made.
Deploying an Application to End Users
Once you have built and tested the Views and View Hierarchy, there are typically very few steps remaining before deploying the application to users. Most notably, the end users normally do not have access to the Admin menu. In Dodeca, it is easy to use all of the views, view hierarchies and other artifacts and package them in a manner that eliminates the end user’s ability to perform any process that appears on the Admin menu. In Dodeca, the Application configuration controls this behavior and, in fact, the metadata starter kit ships with the USER Application object that is configured for end users.
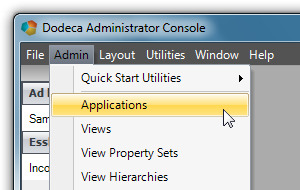
To view the USER application object, select Admin > Applications to open the Applications metadata editor.
Select the Dodeca User Console application from the metadata list. Dodeca retrieves the metadata from the selected application from the metadata store and presents it in a property grid.
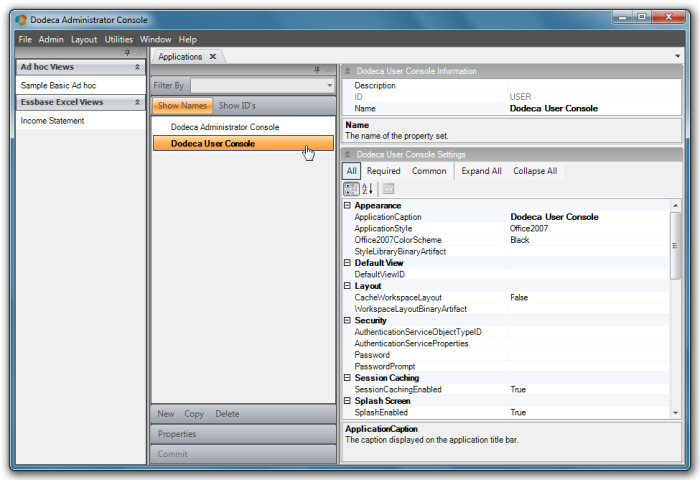
The most important properties to note in the information section of the property grid are the ID and the Name properties.
The Name property is the name displayed in the metadata list of the metadata editor.
The ID property has two very important functions. It is the value that is stored in the relational metadata store and is also used in the URL which launches Dodeca to indicate the Application object which configures the smart client for the user.
The ApplicationCaption property is used as the caption in the title bar of the smart client window.
Scroll down in the property grid to see the properties in the UI category. The UI category determines the menus and toolbars used in the smart client window. Specifically, the ToolbarsConfigurationID is the ID of the ToolbarsConfiguration object that will be the base menu and toolbar Dodeca uses. Further, the UseDefaultAdminToolbarsConfiguration configures Dodeca to show the built-in administrative toolbars only when administrative toolbars are desired.
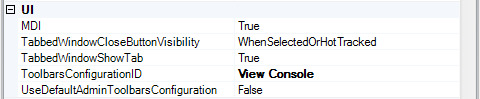
To configure an end user application, select the View Console in ToolbarsConfigurationID and set the UseDefaultAdminToolbarsConfiguration property to False.
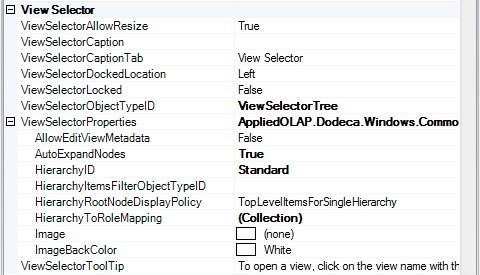
Scroll down to the View Selector category. Note the ViewSelectorObjectTypeID property is set to ViewSelectorTree. This property allows administrators to configure the look and feel of the view selectors used by their users. Further, the View Selector implementation may have its own set of properties which are used to configure the View Selector.
The View Selector configured for the Dodeca User Console uses the ViewSelectorTree implementation which renders the selected View Hierarchy in a tree-view. Further, the AutoExpandNodes property is set to True which causes the tree-view to open in an expanded format.
| the HierarchyToRoleMapping property can be used to assign different View Hierarchies to users in different roles. For more information on using roles in your application, contact Applied OLAP technical support. |
Once you have committed any changes made in the Applications metadata editor, use the following URL to launch the end user application.

Note that the application parameter on the URL indicates the ID of the desired Dodeca User Console application. Using this URL, Dodeca opens and appears somewhat different.
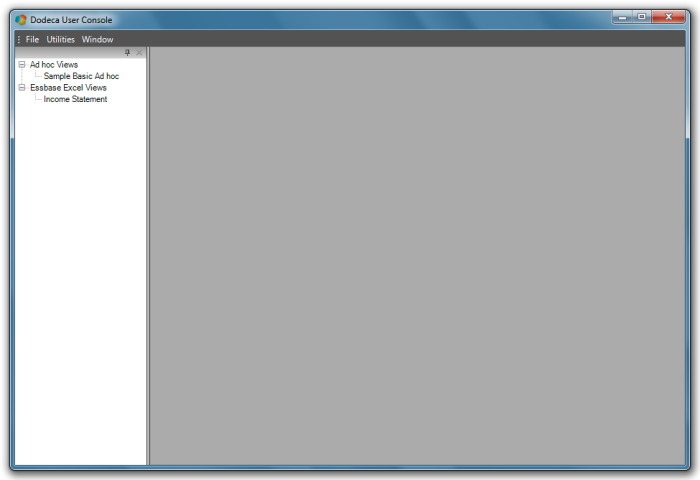
The Dodeca User Console application does not have an Admin menu option and has a tree-view based view selector.
Adding a Send Range to an Excel Template
Retrieve ranges were added to the Income Statement template (reference page 59) to differentiate the data within the range from other tokenized information in the template. Following this same reasoning, send ranges can now be added to the template.
First, export the template back to the computer’s desktop to edit it in Microsoft Excel. To do this, from the Dodeca Administrator Console select Admin > Binary Artifacts.
Click on Income Statement to open its editor and click Export.
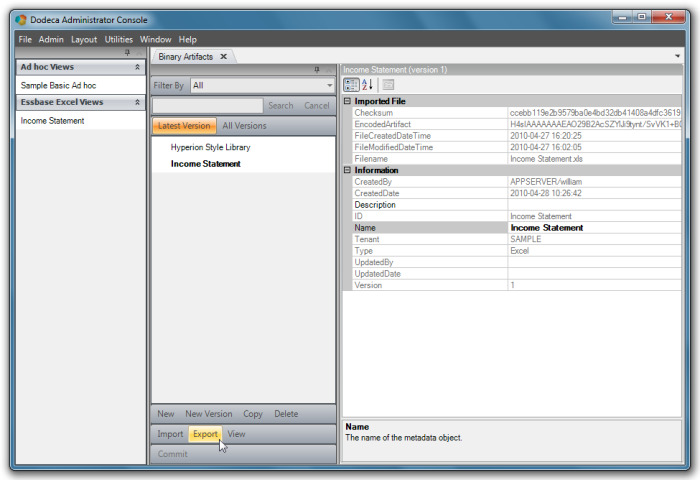
When the Export dialog opens, save the .xls file to the desktop.
The template opens in Microsoft Excel.
NOTE: When the template was created, row 5 was hidden.
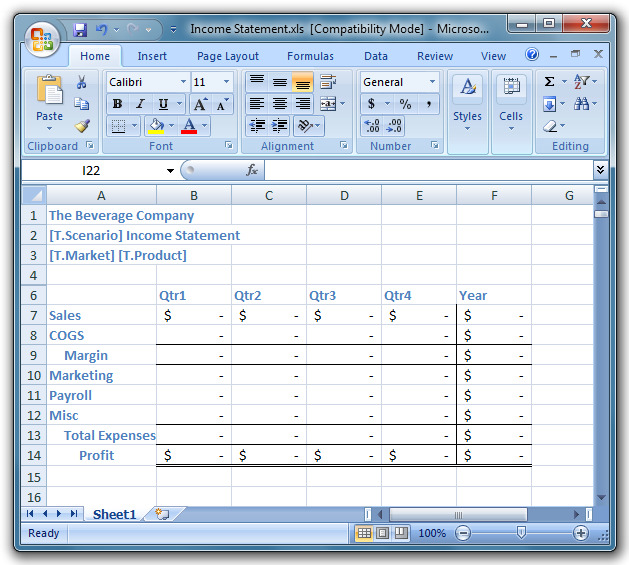
Make row 5 available again, and then highlight A-5 through F-14
In the Microsoft Excel toolbar select Insert > Name > Define to open a dialog.

In the dialog, type in Sheet1!Ess.Send.Range.1 in the Names in workbook box and click Add. Click OK.
| Adding the worksheet name followed by ! (Sheet1!, could be Region! or whatever the sheet is named) to the front of the Send Range confines the specified range to the specified sheet (in this case 1) rather than sending the specified range throughout the entire workbook. This is not a required step, but it is recommended to facilitate the use of cascading features. |
Now that you have edited the template, go back to the Dodeca Administrator Console and into the Binary Artifacts metadata editor.
This time, click Import. In the dialog select Income Statement and click Open to import the edited template. Once the edited template is imported back into Dodeca, commit the changes in Binary Artifacts and close it.
Open the Views editor and click on Income Statement. There are some necessary changes to be made in order to facilitate these edits. In the Behavior Properties set the AllowSend property to True. This simply turns on the Send function. Still in Behavior Properties, set the SendPolicy to SendRanges. This prompts Dodeca to look for the Send Range name to limit which cells are sent to the database. Otherwise the entire worksheet would be sent.
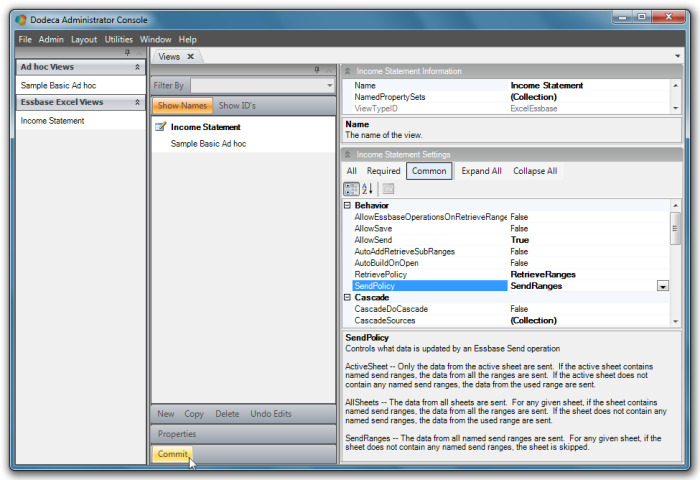
Commit the changes.