Creating a Workbook Script
The workbook script is a powerful Dodeca feature used in spreadsheet based views. It enables the administrator to define logic that is in response to a specific user-triggered event without the need to write complicated code. The following section provides a step by step tutorial on creating a workbook script. In this example, the defined logic is a run calculation that the specific event of using the Essbase send function triggers. Additionally, the run calculation becomes the event when it triggers a text box stating that the calculation is complete.
The following section provides step by step instructions for completing a simple workbook script procedure.
In the Dodeca Administrators Console, select Admin > Views. Open the Income Statement view.
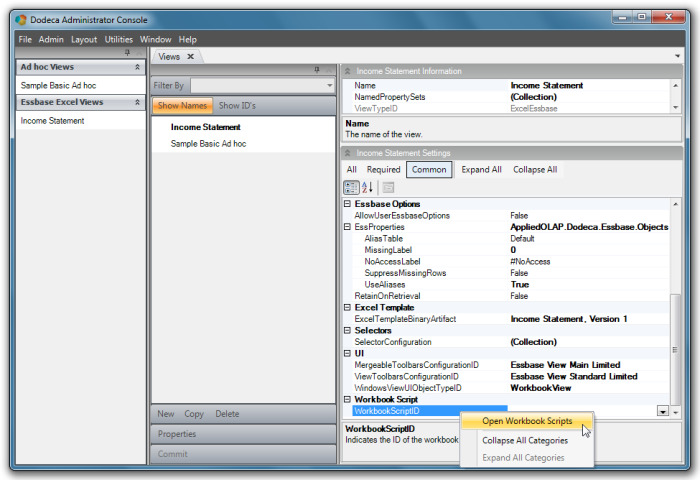
Scroll down to the bottom of the properties. Highlight, and then right click on the WorkbookScriptID property. Click Open Workbook Scripts and the Workbook Scripts metadata editor opens.
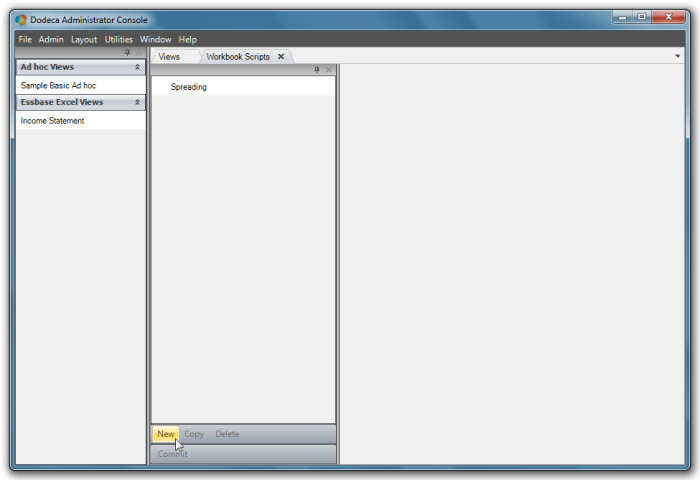
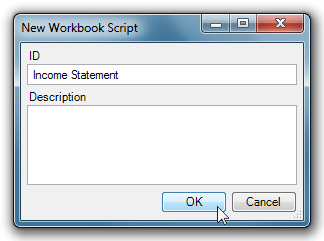
Click New. The New Workbook Script dialog displays. Type Income Statement in the ID box and click OK.
| The Income Statement ID/Name has been used throughout the tutorials for simplification purposes (Excel Template, Binary Artifact, Essbase Excel View). These features (including the new Workbook Script) are not required to have the same, or even similar, names to each other. The Income Statement Workbook Script is not specific to the Income Statement View and could be added to other views. |
Creating a New Procedure
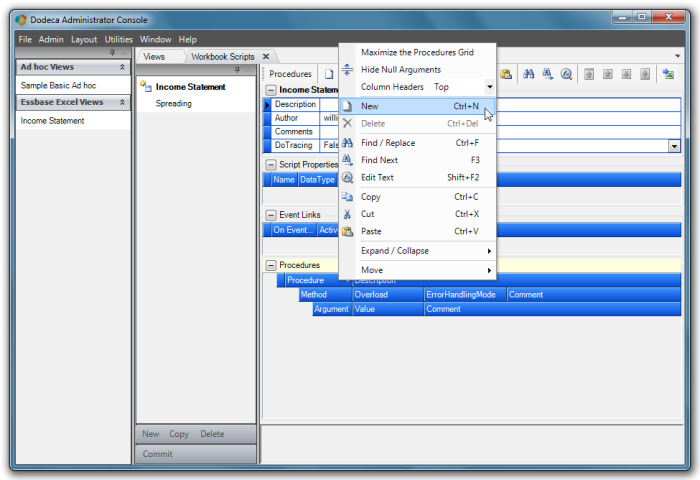
The Income Statement Workbook Script displays.

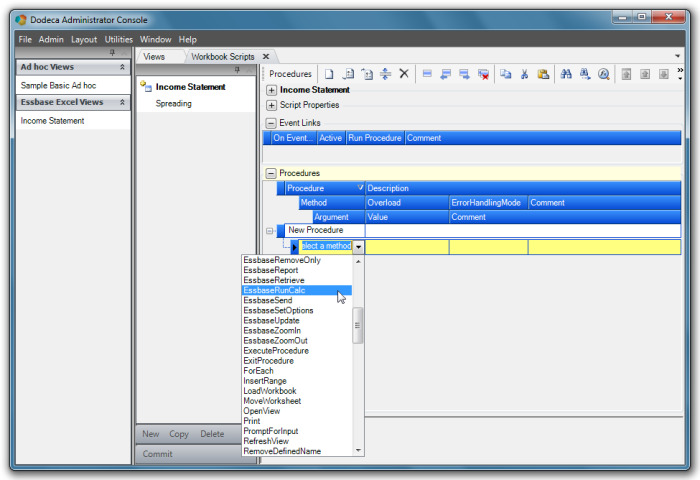
Right click on the Procedures column to display a menu. Click New to create a new procedure.
Adding a Method
The new procedure opens the Method selection menu. There is a broad range of common methods to choose from. In this case, select EssbaseRunCalc for the method.
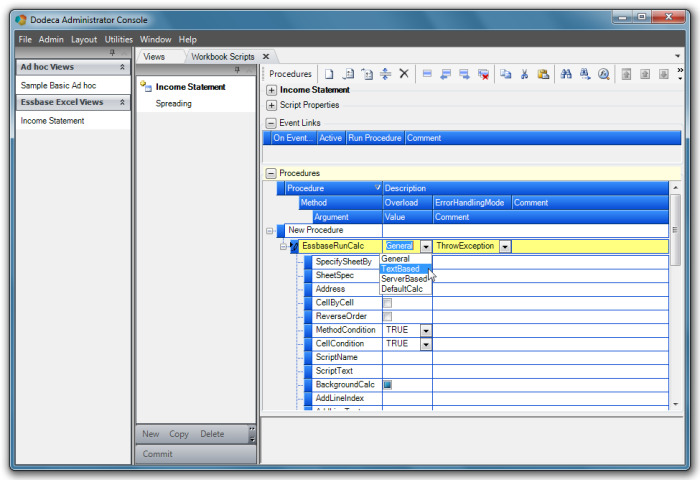
In the Overload column (immediately to the right of the Method), select Text Based from the menu.
Adding Script Text
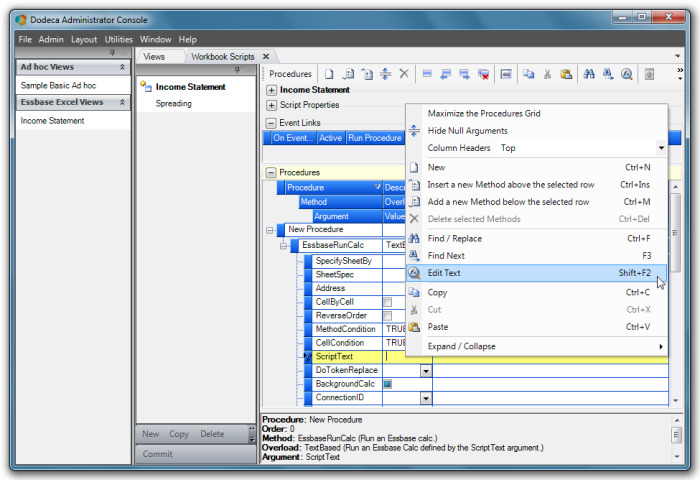
Right click on the ScriptText Value field and select Edit Text from the context menu.
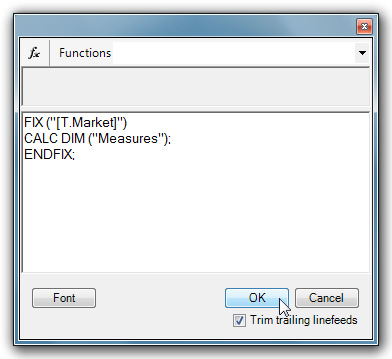
Type the desired script in the Edit Cell Text dialog and click OK. In this case, use the script shown in the following screenshot.
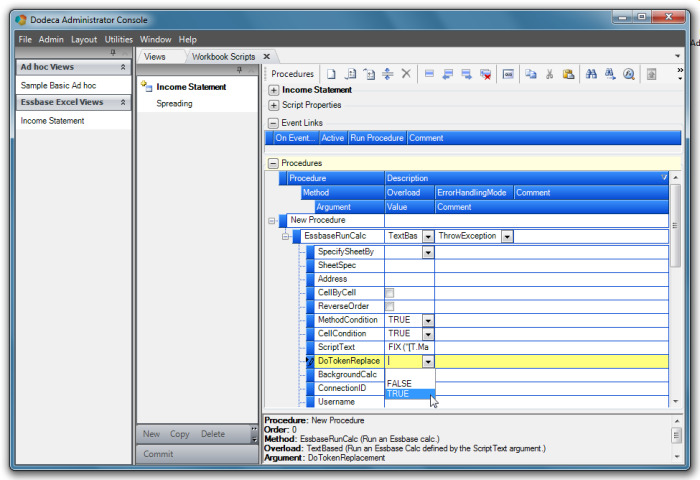
Scroll down and set DoTokenReplacement to TRUE. This setting associates the Tokens in the script with the values of the selectors they are named for (Market, Measures). Now the calculation in the procedure will compute those specific values as they are found in a view rather than a meaningless Token value.
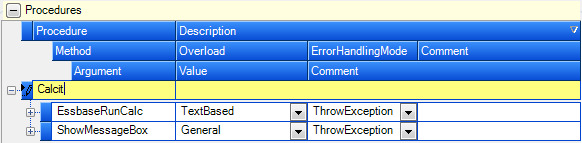
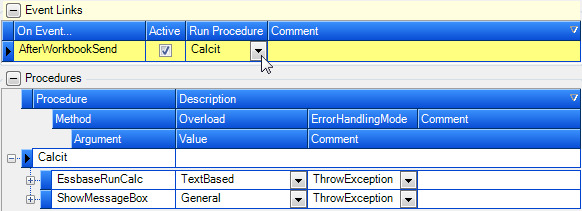
The Essbase Run Calc method is now complete and added to the Calcit Procedure.
You can add other methods to expand on the procedure. For purposes of this tutorial, a message box that displays after the calculation will indicate the Workbook Script and tool are working.
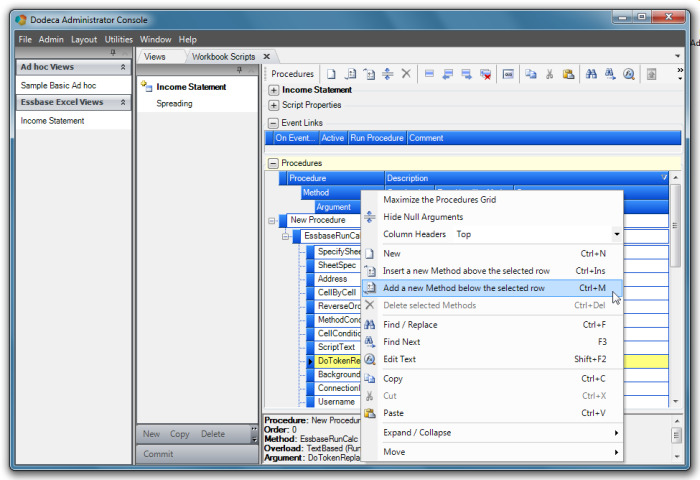
To add a message box to the procedure, highlight and right click on the EssbaseRunCalc method row. Click Add a new Method below the selected row option from the dialog menu.
A new row displays below the EssBaseRunCalc method. Selecting ShowMessageBox from the menu displays options in the row labeled Message; type in The calc is complete!
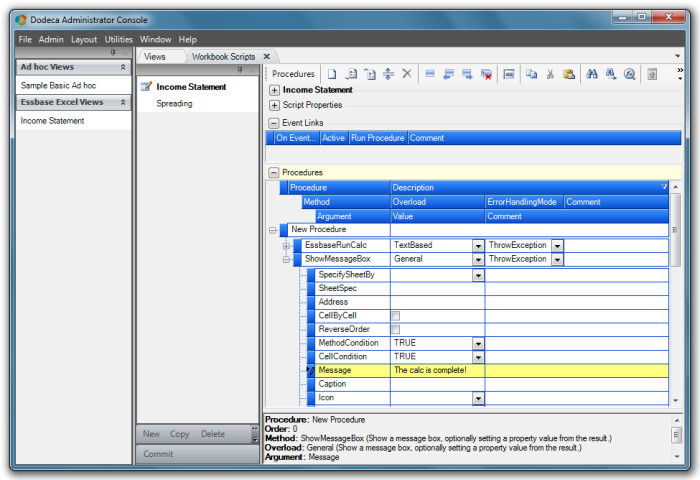
The EssbaseRunCalc method is now followed by a message box letting the user know “The calc is complete!”.
To rename the procedure, simply highlight the New Procedure text and type in the new name (in this case, Calcit).
To define when the procedure runs, right click the On Event row to display the menu and select New. Select AfterWorkbookSend in the On Event column. Make sure it is active and select the new procedure Calcit from the Run Procedure menu. This prompts the run calculation procedure to initiate after the Essbase Send function has been performed.
To save the new procedure, click Commit in Workbook Scripts.
To assign the procedure to the Income Statement view, open the Views metadata editor and the Income Statement view. Scroll down and make certain that Income Statement is selected in the WorkbookScriptID property and click Commit.

The procedure is now complete and ready to be used in the Income Statement View.
To test the procedure, open Income Statement from the view selector menu. Make sure the Selectors are filled and build the view.
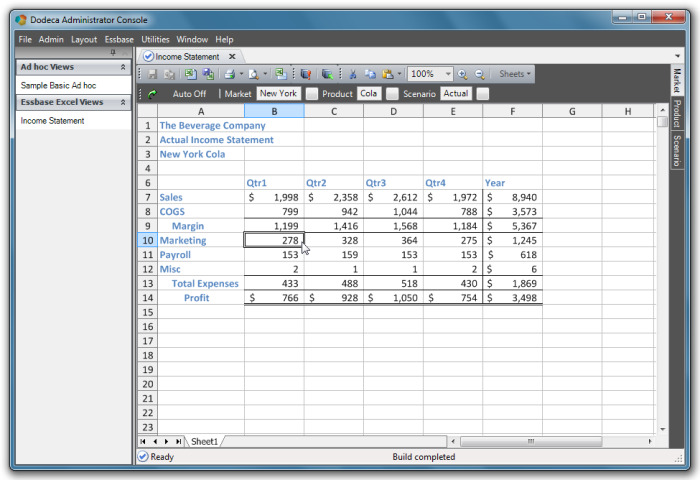
Make a change in the data and click on the send icon in the toolbar.

After the send is complete, the message box should display and a Calc Completed message displays at the bottom of the screen.
If the procedure does not run after the build, check the error details for clues. The most likely cause would be a missed character or space in the short script (see page 93) written for the Essbase Run Calc. Open the Workbook Script metadata editor and the Income Statement view. Expand the Calcit Procedure and the EssbaseRunCalc method. Scroll down to the Script Text row and check for errors. Correct any errors and commit the changes. Re-open Income Statement from the view selector menu and repeat the build and send procedures.