View Property Sets
The view property sets are optional metadata settings that can control the configuration and behavior of multiple views as a group. The properties are the same as those reviewed for a single view.
Adding a Property Set to a View
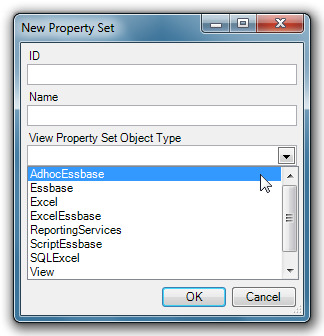
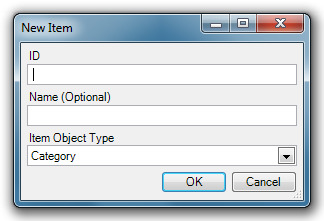
To add a new property set, click the New command button in the editor. When the New Property Set dialog displays, fill in the ID, Name and Object Type (see diagram above) and click OK.
| If a binary artifact(s) is selected in a property set, it will only show up in the host view if host view does not already have a binary artifact(s) selected. Otherwise, only the view properties will affect the view. |
View Hierarchies
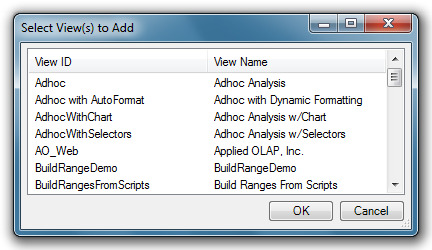
View hierarchies provide the lists of views available to a user and the organization of those views in the list.
Properties
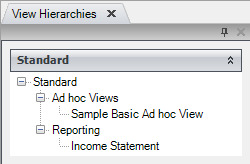
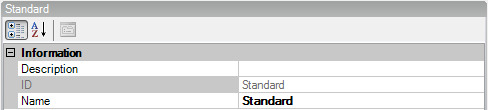
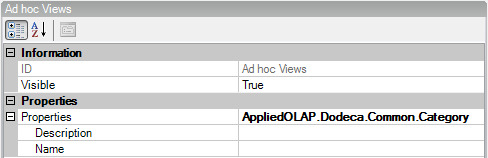
In the illustration above, the Hierarchy is Standard; the Categories are Ad hoc Views and Reporting; and the Views are Sample Basic Ad hoc and Income Statement. The View Hierarchies metadata editor gives the administrator a clear view of the organization of the available views.
Hierarchy
The ID is a string that uniquely identifies the item. The Name is the name of the metadata object and is the name that displays in the view selector.

Selectors
Selectors are the objects that define the dimensions or sources from which users may make selections to filter their views. Selectors also define the tokens that may be used to substitute into worksheets, Essbase report scripts, Essbase calc scripts and SQL scripts.
Properties
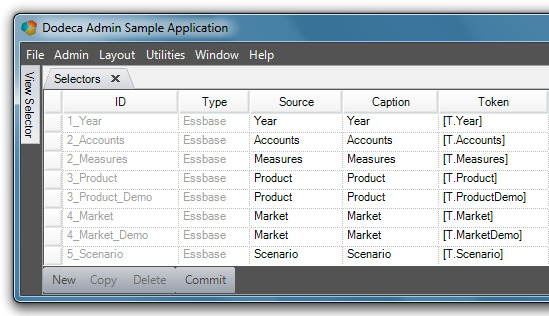
ID: The unique name that identifies a selector. Once a selector is committed, the ID becomes read-only.
Type: A filter for the different types of selectors that Dodeca supports, including Essbase, SQL, and Generic selector types.
Source: The source or entity represented by the selector.
| Source name is only relevant for Essbase-type reports. However, a generic combo box uses the Source as the message box caption when a user types in an invalid selection. |
Caption: This is the same as the member name that the user sees in the report.
Token: The value that can be substituted into spreadsheets, formulas, Essbase report scripts and calculation scripts, and SQL statements. A Token is an object which represents the (often exclusive) right to perform some operation.
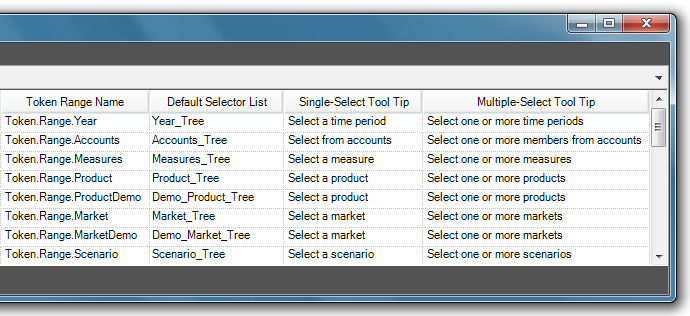
Token Range Name (optional): The name of the defined range that refers to the cell(s) that represent the selector source in an Excel-compatible spreadsheet control.
| Token.Range.Name is only relevant for Essbase-type selectors. |
Default Selector List: A template of selector settings which can be referenced when creating new selectors. See Selector Lists (on page 105).
Single-Select Tool Tip: The dimension tool tip that the user sees when a single generation selection is enabled.
Multiple-Select Tool Tip: The dimension tool tip that the user sees when multiple generation selections are enabled.
Essbase Selectors
The Essbase Selectors metadata editor is fundamentally the same as the Selectors metadata editor. The sole exception is that only Essbase-type selectors are listed.
Remarks
Selectors are the objects that define the dimensions or sources from which users may make selections to filter their views. The Importing Dimensions and Creating Selectors and Selector Lists section of the guide explains the process of importing dimensions and creating selectors. Selectors also define the tokens that may be used to substitute into worksheets, Essbase report scripts, Essbase calc scripts and SQL scripts.
Selector Lists
The selector lists provide both the contents of the list from which a user may choose in a selector and the configuration of the user interface which may be treeview, listbox or combobox.
The Selector Lists metadata editor enables a user to customize selector properties. A selector list functions as a selectors template that can be referenced when creating a new selector(s) in the Selectors metadata editor. Additionally, Selector Lists provide both the contents of the list from which a user may choose in a selector and the configuration of the user interface.
Information
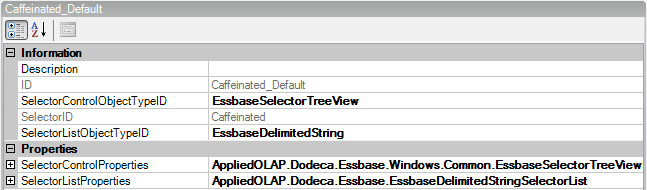
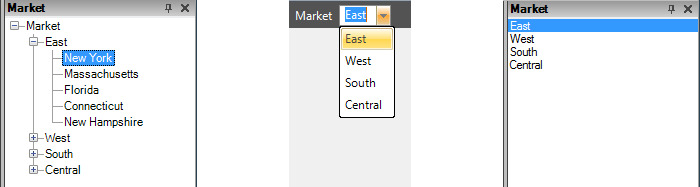
The Description is simply a description of the Selector list (date created, etc). The ID is the string value that uniquely identifies the Selector List. SelectorControlObjectTypeID is the object type ID of the selector control. SelectorControlObjectTypeID determines the look of the Selector menu with available Tree View, Combo Box or List Box options.
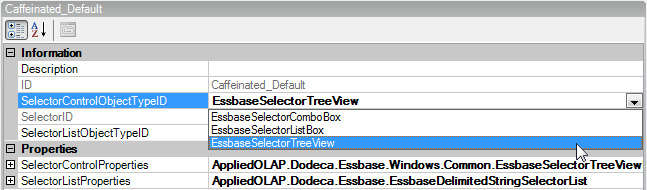
Tree View Combo Box List Box
SelectorID is the ID for the selector for which a specific selector list can be used to generate selectable items.
SelectorListObjectTypeID is the ID of the object type that contains the settings.
Properties
SelectorControlProperties are the properties used to configure the Selector Control.
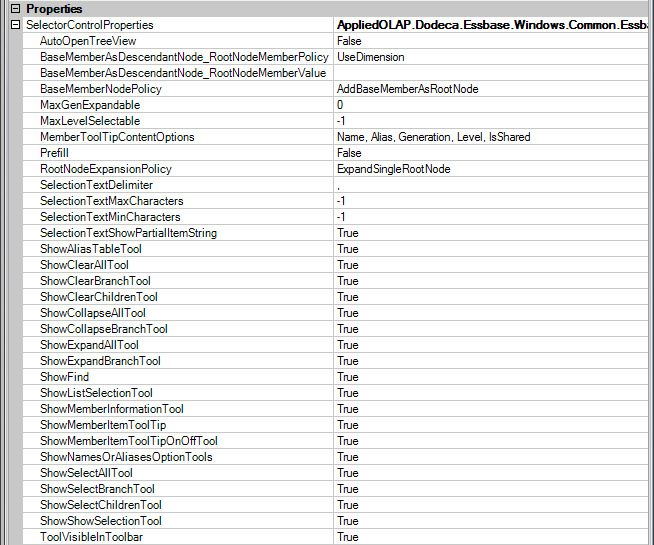
The members generated by the selector list are referred to as base numbers. The BaseMemberNodePolicy setting controls whether the base members are added to the tree or root nodes or as descendant nodes.
If the BaseMemberNodePolicy is set to AddBaseMemberAsRootNode, a root node is added to the tree for each base member. When the setting is AddBaseMemberAsDescendantNode, if abase member has ancestors, a node is added to the tree for each of the member’s ancestors and for the base member. If the base member does not have ancestors, a root node is added only for the member. When the base members are added as descendant nodes, the BaseMemberAsDescendabtNode_RootNodeMemberPolicy controls how the member that is to be represented by the node is determined. The root node, which represents an ancestor of the base members, can be the dimension or another ancestor based on a specific generation, level or member name. In this same scenario, the BaseMemberAsDescendantNode_RootNodeMemberValue setting is used to specify the generation number or name, the level number or name, or the name of the member that is to be represented by the root node.
Prefill indicates whether nodes representing only the immediate children or all of the descendants of a base member are populated in the tree when the base member is added. By default the value is False which indicates that nodes are added for the immediate children only. When the user expands a node that is not filled, the tree automatically populates the selected node. Setting the value to False is the preferred approach, because it typically yields better performance.
RootNodeExpansionPolicy controls whether the root nodes are automatically expanded. The root nodes are the top-level nodes in the tree and represent the list of members that are generated based on the selector list.
AutoOpenTreeView controls whether the treeview is automatically displayed when the view is opened.
If the BaseMemberNodePolicy is set to AddBaseMemberAsRootNode, a root node is added to the tree for each base member. When the setting is AddBaseMemberAsDescendantNode , if a base member has ancestors, a node is added to the tree for each of the member’s ancestors and for the base member. If the base member does not have ancestors, a root node is added only for the member. When the base members are added as descendant nodes, the BaseMemberAsDescendabtNode_RootNodeMemberPolicy controls how the member that is to be represented by the node is determined. The root node, which represents an ancestor of the base members, can be the dimension or another ancestor based on a specific generation, level or member name. In this same scenario, the BaseMemberAsDescendantNode_RootNodeMemberValue setting is used to specify the generation number or name, the level number or name, or the name of the member that is to be represented by the root node.
MemberToolTipContentsOptions controls the member information presented by the tool tip displayed when the mouse hovers over a member item.
When the user is allowed to select multiple items, the selection text displayed by the selector is a delimited list if substrings in which each substring represents a selected item. The SelectionTextDelimiter defines the character used to to delimit the substrings. By default, the delimiter is a comma followed by a blank.
SelectorListProperties are the properties used to configure the Selector List.
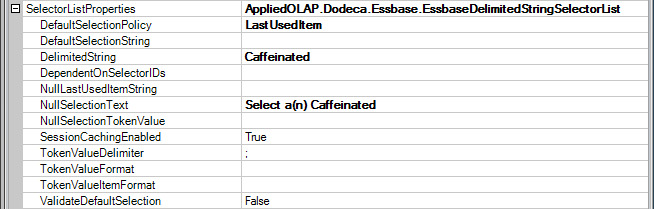
DefaultSelectionPolicy allows for options with the default selection when a view is opened.

-
None – View opens with no selectors configured.
-
LastUsedItem – View opens with selectors configured as with the last items selected before closing the view.
-
FirstItem - View opens with selectors configured as with the first items selected the previous instance the view was opened.
-
SpecifiedString – View opens with a specified string.
The DefaultSelectionString is a specific string set up for the DefaultSelectionPolicy when using SpecifiedString. This string can be Tokenized and is only applicable when the DefaultSelectionPolicy is set to SpecifiedString. The DelimitedString is a semi-colon list of strings representing the list items and DependantOnSelectorIDs is a semi-colon delimited list of ID’s of the other selectors that affect this selector list. At runtime, when a selection changes for any of the specified selectors, this selector list is automatically re-generated. The NullLastUsedItemString represents the item value(s) used as the default when the DefaultSelectionPolicy is LastUsedItem and no last used item exists. NullSelectionText is the text displayed by the selector when no item is selected and the setting is often used to display a prompt. NullSelectionTokenValue is the text assigned to the token when no item is selected, typically used to specify the token value for a selector that is configured as optional but still needs to be represented by a token.
When a user is allowed to select multiple items, the token value is a delimited list of substrings in which each substring represents a selected item. The TokenValueDelimiter defines the character(s) used to delimit the substrings within the token value. By default, the delimiter is a semi-colon. TokenValueFormat is the value used to create the value that is assigned to the token. By default, the token value is a semi-colon delimited list of substrings in which each substring represents a selected item. If the token value needs to contain additional text prepended and/or appended to the text representing the selected items, you can use the TokenValueFormat to specify the text. The format must contain the format item {0}, which is replaced with the selected item string.
Remarks
ValidateDefaultSelection determines whether the defualt selection is validated. Typically, the best runtime performance is achieved by setting the ValidateDefaultSelection to False and the DefaultSelectionPolicy to LastItemUsed.
SessionCachingEnabled controls whether the list of Essbase members generated by the selector are added to the session cache. By default, the items are cached. Session caching should be disabled when the members belonging in the dimension represented by the selector list change frequently and are likely to change over the course of the session. Performance can be improved when session caching is enabled. This setting is only applicable when the application’s SessionCachingEnabled setting is True.
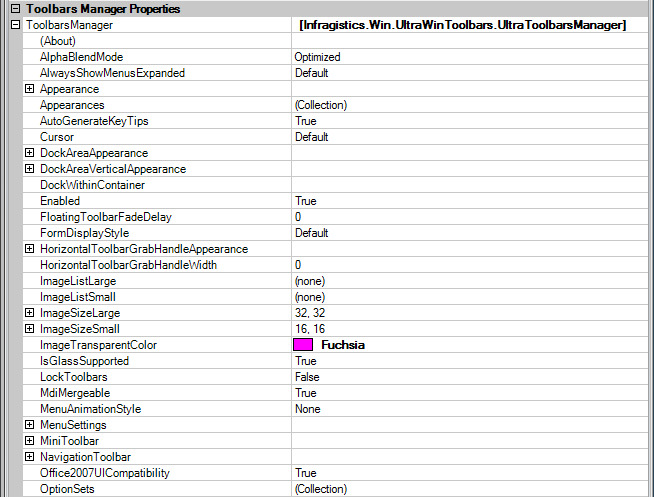
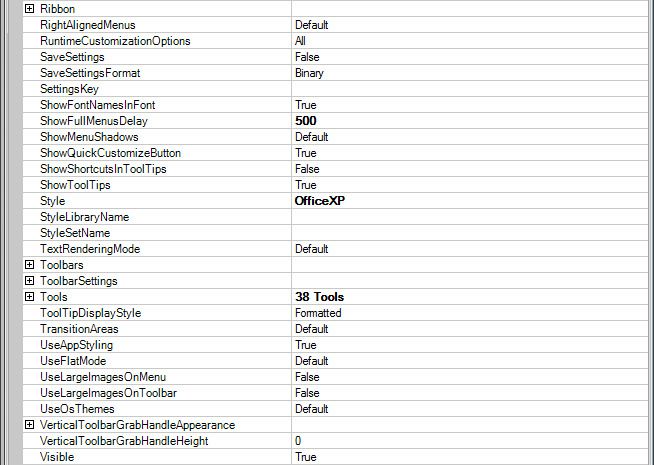
Toolbar Configurations
The toolbars configurations are the toolbars and menus available to Dodeca users. All toolbars in Dodeca are configured as metadata and that Dodeca administrator can completely control them. The Toolbar Configurations metadata editor allows the administrator to create and customize generic toolbars for user and administrator views. Once created, toolbar configuration templates are accessible in the drop-down list under UI in the Views metadata list.

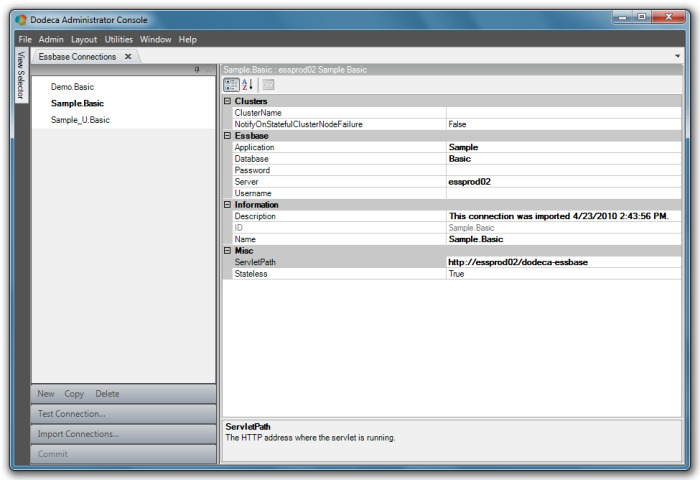
Essbase Connections
Essbase connections define a single Essbase server, application and database and specify the web service Dodeca uses to talk to the Essbase database.
Properties
The Editor is categorized into the following property groups:
Essbase
The Application is the name of the Essbase application and the Database is the name of the Essbase database. The Server is the Essbase server location specific to User/Client’s machine. Password/Username requires a valid username and password for the users Essbase service. Leaving blank requires user to enter valid information to access applications.

Information
An imported Essbase connection will automatically add the date and time a connection was imported to the Description. Manual information can be added by clicking on the ellipses and typing in the dialog box. The ID is the string value that uniquely identifies the Metadata.
The recommended format for the ID is server.application.database. Recommended procedure is to use the ID as the Name of the metadata object.

Miscellaneous
The ServletPath is the Client specific HTTP address where the servlet is running. When Stateless is set to True, the Essbase Connection remains connected while the application is open and disconnects when the user closes the application (requiring log in for each instance). When set to False the Essbase connection is stored and remains connected until it times out.
Creating an Essbase Connection
The Creating Essbase Connection Definitions section (page 26) of the Administrators Guide provides a good explanation of importing Essbase connections using the Quick Start Utilities function.
The Import Connections command button in the Essbase Connections editor performs these same functions.
Binary Artifacts
Binary artifacts are miscellaneous files that may be used in a Dodeca application. Typical types of binary artifacts include Microsoft Excel templates and Dodeca style libraries. The Binary Artifacts metadata editor enables you to import files that contain Essbase-aware spreadsheets; for example, an .xls (Microsoft Excel) file. You can import the spreadsheet’s layout and formulas into Dodeca and use the spreadsheet as a template to build a report(s).
Properties
Imported File

Checksum refers to the checksum on the binary object that will determine if the file has been changed and needs to be updated on the client. The EncodedArtifact is the gzipped and encoded representation of the object. FileCreatedDatTime and FileModifiedDateTime are the creation and modified timestamp of the imported file formatted in local time using the local culture. Once imported and committed, this information becomes read-only.
Information
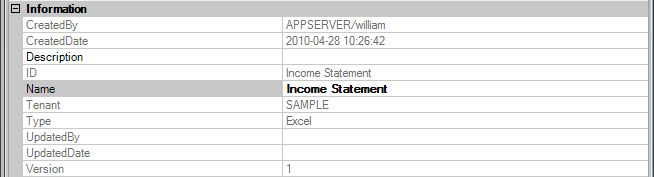
The Information properties include a name, creator, creation date and description of the Binary Artifact. The Tenant is a component of the key that can distinguish between different customers, divisions, etc. within a database. The Type is a component of the key that distinguishes the different types of metadata stored in the metadata server.
Remarks
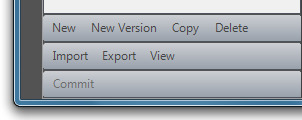
The Command Buttons for the editor include import and export buttons and a New Version button.
Review the sections on Send Ranges and Retrieve Ranges for step by step directions for importing and exporting from the Binary Artifacts editor.
The New Version command button allows the user to make a change in a template, save the original, and not require a name change to the New Version other than attaching a Version number to it.
Workbook Scripts
Workbook Scripts allow administrators to customize the generation and behavior of views using an event-driven paradigm.
The Workbook Scripts metadata editor enables the administrator to create custom scripts using pre-defined code. Applied OLAP, Inc. has embedded code into unique script names to facilitate and extend administrator controls.

Description,Author and Comments can be added in the information section.
DoTracing can capture and review a trace of the procedures and methods executed by the script at runtime. Tracing provides a way to see the process flow of a workbook script, and can be used both for debugging and optimizing a script. A log file, WorkbookScriptTrace.log, contains the trace. It is created in the application directory.
When running from the installation directory, the file path is similar to the following:
C:\Program Files\Applied OLAP\Dodeca Framework 5.0.1.0\bin\Dodeca\WorkbookScriptTrace.log
When running the application from a ClickOnce deployment, the file path is similar to the following:
C:\Documents and Settings\<user>\Local Settings\Apps\2.0\AKAJV241.LPT\WO6J5R6C.2DV\appl…app_e3cc73a6adce853a_0001.0000-21DB1DDA2FF0CEEB\wORKBOOKsCRIPTtRACE.LOG
The log file is a text file, which can be opened either in a text editor or Microsoft Excel. When you open the file in Excel, the trace information is more structured and easier to review than it is with the text editor. The log contains a trace of the procedures and methods the workbook script executed. To record all procedures and methods, the workbook script’s DoTracing should be set to True. To log only the procedures and methods executed during a specific interval, the SetTrace method is used to turn tracing on or off. The SetTrace method also supports a TraceArguments setting that configures whether method arguments are written to the log, and if so, whether a method’s arguments are written to one row or multiple rows. Only method arguments with a specified value are written to the log.
Event Links

The Event Link can be described as the trigger for the procedure. Conversely, the Procedure is the action that is prompted by the Event Link. In the example in the previous section, AfterWorkbookSend, the procedure will initiate once a workbook send command is selected.
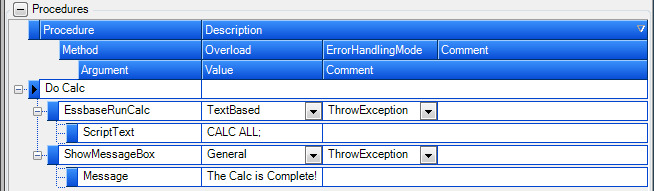
If the Procedure is the action that is prompted by the Event Link, the Methods, Arguments and Overloads make up the mechanism that drives the procedure. Looking at the examples above, there is a procedure named Do Calc. There is a EssbaseRunCalc Method with a TextBased Overload associated with this Procedure, the Method has a ScriptText Argument with a Calc all; value associated with it. What this means is that when the Event Link triggers the procedure, the Essbase Run Calc with the script text of Calc all; will initiate. A second Method was added to the above example. ShowMessageBox has an Argument of Message with a Value of The Calc is Complete. This means once the Runcalc in the first Method has been completed the user will see a message box displaying the message The Calc is Complete.
Remarks
There is a detailed example, Creating a Workbook Script, in this guide which shows you step by step instructions to create a workbook script.
Modules
Modules are extensions to the Dodeca Framework, written in C# or VB.NET, and are comprised of DLLs, XML configuration files and optionally other files.
Imported File

Checksum refers to the checksum on the binary object that determines if the file has been changed and needs to be updated on the client. The EncodedArtifact is the gzipped and encoded representation of the object.
FileCreatedDateTime and FileModifiedDateTime are the creation and modified timestamps of the imported file formatted in local time using the local culture. Once imported and committed, this information becomes read-only.
Information
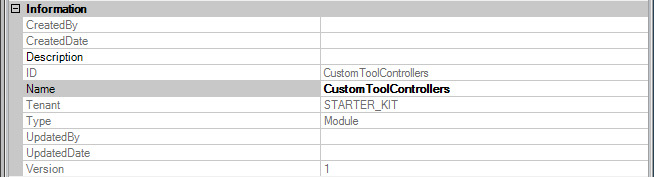
The Information properties include a name, creator, creation date and description of the Binary Artifact. The Tenant is a component of the key that can be used to distinguish between different customers, divisions, etc. within a database. The Type is a component of the key that distinguishes the different types of metadata stored in the metadata server.
Module Contents
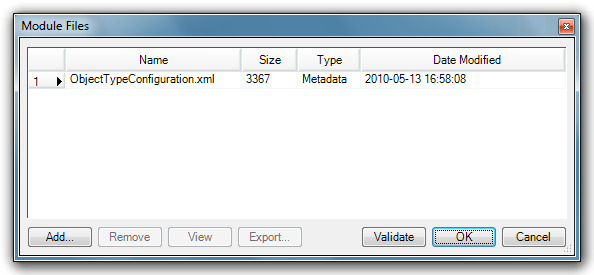
Clicking on the ellipses at the end of the Files row displays an ArrayList of ModuleFileMetadata objects representing the files that comprise the package including assemblies, metadata XML files and supporting files.
*Module Files *
SQL Passthrough Datasets
SQL Passthrough Datasets are defined queries that are executed on the server with the results passed back to the Dodeca client in DataSet format. They are often used for populating selector lists or for displaying relational data in Dodeca.
Properties
Information
The Description property is where you can add descriptive information manually by clicking on the ellipses and typing in the dialog box. The ID is the string value that uniquely identifies the metadata and the Name is the name of the metadata object.

Miscellaneous
The SessionCachingEnabled property controls whether the data the SQL PassthroughDataSet queries generate are added to the session cache. By default, the data are not cached. Session caching should only be enabled when the results of the queries will not change over the course of a session (i.e. when queries are not data-dependent). When the results are not data-dependent, performance can be improved by enabling session caching. This setting is only applicable when the application’s SessionCachingEnabled setting is True.
Queries are an array of query objects to execute. Clicking on the elipses in the Queries row displays the Query Editor.

The Query Editor is also organized with a set of properties. Columns refers to the name and type of each column returned by the query.
The Connect String defines the hibernate connection properties used to specify the database connection on the server. The connect string should contain space-delimited Hibernate property name/value pairs.
For example, the following connect string contains the properties and values required to connect to a SQL Server database:
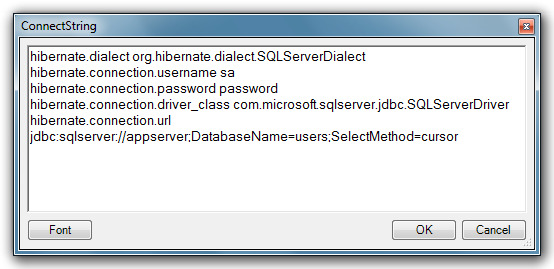
The specified JDBC driver must be contained within a JAR file available to the Java application server or included in the WEB-INF/lib subdirectory of the servlet.
DataTableName is the name of the Data Table in the Data Set to contain the query results. IncrementalMaxRows controls whether all the rows are retrieved with a single call to the database or a specified maximum number if rows are retrieved by multiple, incremental calls to the database until all rows are retrieved. If the IncrementalMaxRows value is less than or equal to 0, all rows are retrieved I a single call. If the value is greater than 0, the value specifies the maximum number of rows retrieved each incremental call to the database until all rows are retrieved. This setting is only used when appropriate. For example, the setting does not apply when the SQLPassthroughDataSet is used for a selector list, but the setting does apply when used by a work book script’s BuildRangeFromScript method.
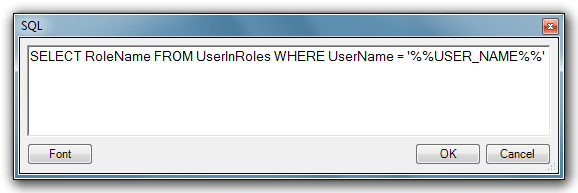
The SQL property represents the SQL statement to be executed on the target relational database. The SQL must use the native syntax supported by the database.
The SQL statement can be tokenized.