Creating a SQL Excel View
A SQL Excel view in Dodeca is created similarly to an Essbase Excel View. It applies many of the same basic principles discussed in the previous section, Creating an Essbase Excel View, with the exception that Dodeca will query one or more SQL data sources to populate the view.
To create a new SQL Excel view, the basic steps are as follows:
-
Define a SQL Connection.
-
Define a SQL Passthrough Dataset.
-
Create the Microsoft Excel template for the view.
-
Create the new view in the Views metadata editor.
-
Modify relevant properties of the new View and commit the changes.
-
Expose the new view on a View Hierarchy.
Defining a SQL Connection
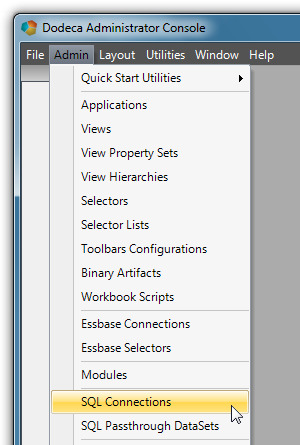
To define or edit a SQL Connection, select Admin > SQL Connections from the Dodeca menu.
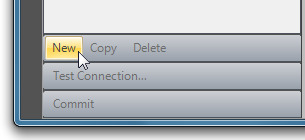
Click New from the SQL Connections metadata editor.
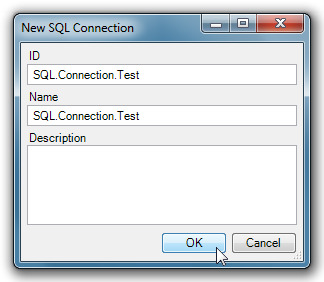
Define an ID and Name for the connection and click OK.
In the properties section for the newly defined SQL Connection, specify the following information:
- ConnectionURL
-
Specifies the JDBC connection URL
- DriverClass
-
The Name of the JDBC driver class
- Password
-
The JDBC password
- Username
-
The JDBC user name
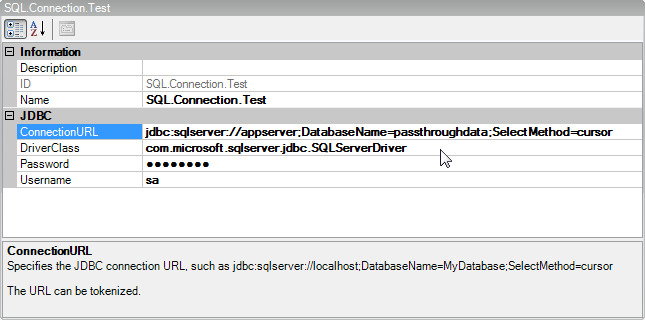
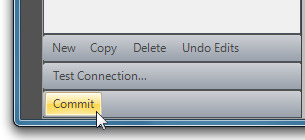
Test the connection using the Test Connection… button, and then Commit the connection.
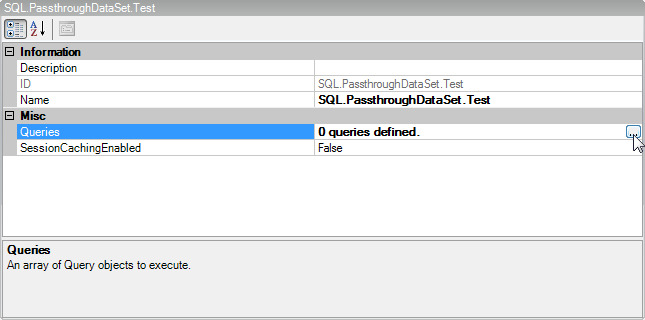
Defining a SQL Passthrough DataSet
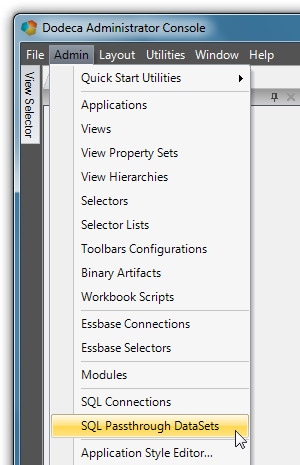
To define or edit a SQL Passthrough Dataset, select Admin > SQL Passthrough DataSets from the Dodeca menu.
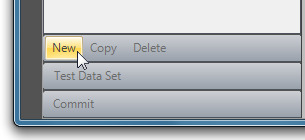
Click New from the SQL Passthrough DataSets metadata editor.
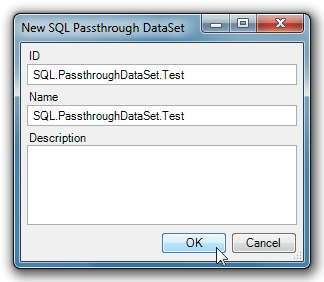
Define an ID and Name for the SQL Passthrough Dataset and click OK.
In the properties section for the newly defined SQL Passthrough DataSet, specify the following information:
- Queries
-
An array of Query objects to execute
- SessionCachingEnabled
-
Controls whether the data generated by the SQLPassthroughDataset queries are added to the session cache.
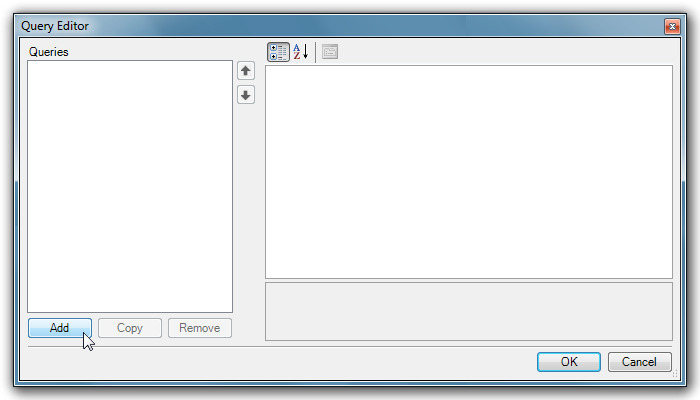
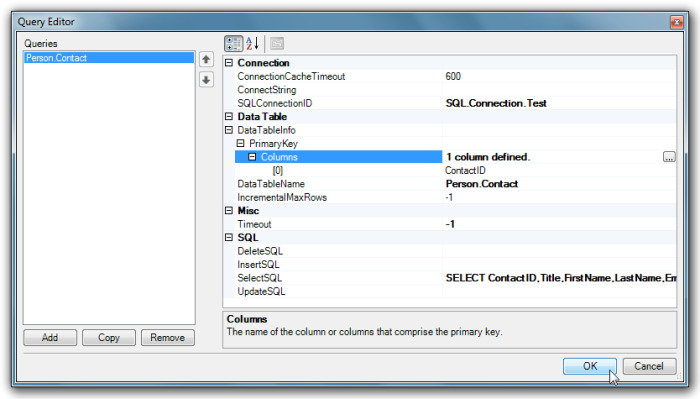
To define one or more SQL Queries, click on the ellipsis to the far right of the Queries property. This displays the Query Editor dialog box.
Click Add to add a new query.
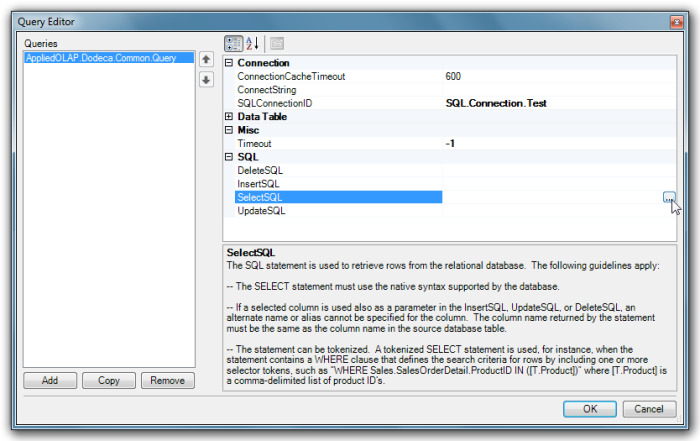
In the Connection properties category, specify the SQLConnectionID of the SQL Connection we just created.

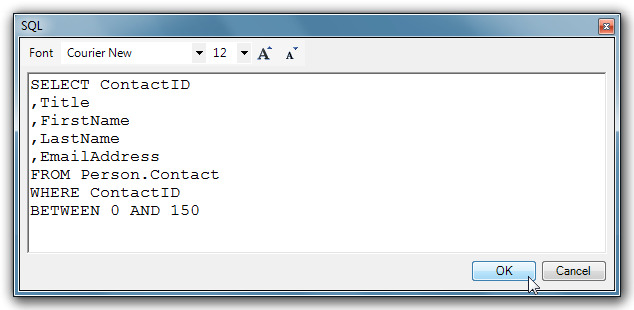
Next, under the SQL category, click on the ellipsis to the far right of the SelectSQL property. This opens the SQL editor dialog box for easy input and editing of a Select SQL statement.
The SQL editor dialog box will look something like the following screenshot.
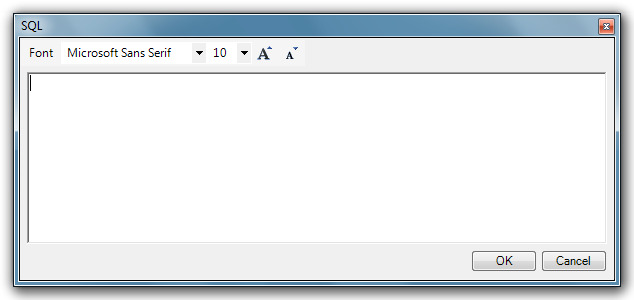
For the purposes of this example, we’re using an AdventureWorks sample database for Microsoft SQL Server 2005. Make sure that you update your SELECT statement to work with the relational data you wish to query, and then click OK.
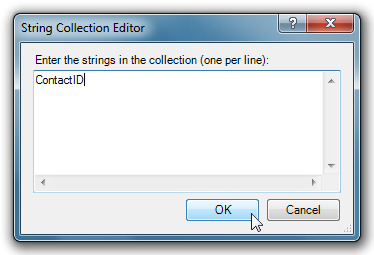
In the Data Table properties category, specify the DataTableName. This is the table from which you are querying your relational data. Next, under the PrimaryKey property, click the ellipsis to the far right of the Columns property. This opens the String Collection Editor.

Specify the name of the column representing the Primary Key for the table being queried, and then click OK.
Click OK to add the query to the SQL Passthrough Dataset.
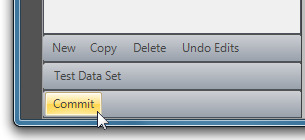
Click Test Data Set to test the newly added query.
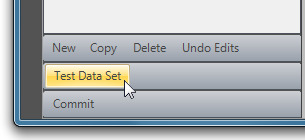
If the query executes successfully, the SQL Passthrough DataSet Preview dialog will appear, showing you a preview of the relational data requested by the SQL Passthrough DataSet’s queries.
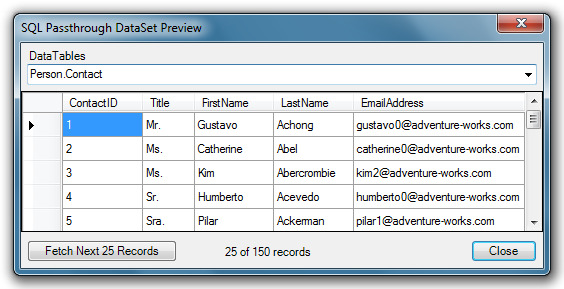
Press Commit to commit the SQL Passthrough DataSet.
Creating an Excel Template
Similarly to creating a template for an Essbase Excel View, we will now create an Excel template that can be used in Dodeca for working with relational data. For this first template, assume the need for a template that allows users to display an Employee Contact Info view. To create this template, follow these steps:
-
Create a new template.
-
Add some appropriate titles and formatting to the template.
-
Add a retrieval range name.
-
Finalize the template.
Creating a New Template
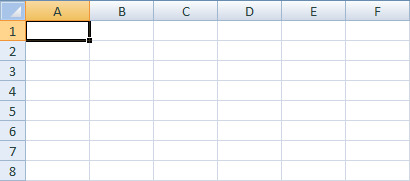
To start, open a new workbook in Excel. You should be looking an empty worksheet.
Adding Titles and Formatting
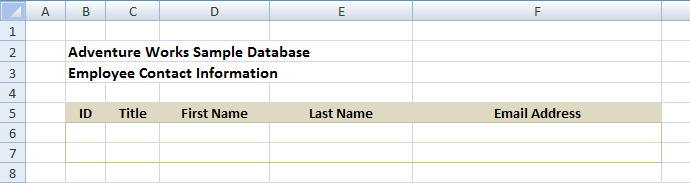
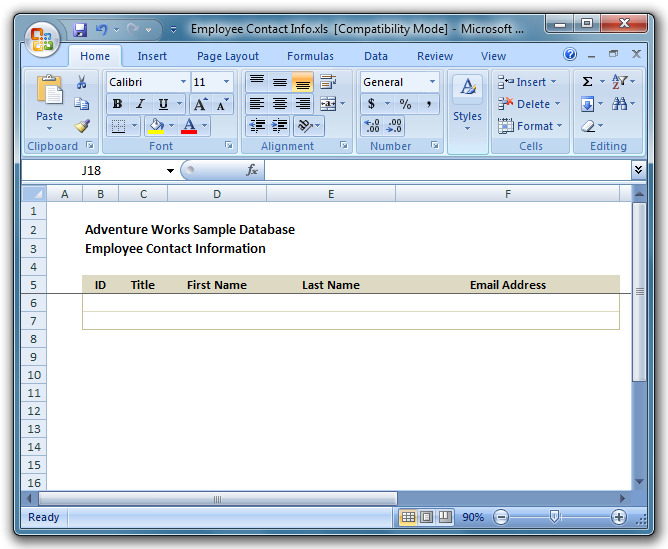
From here, add some nice looking headers and formatting. Virtually any formatting functionality available in Excel can be used and properly rendered within the Dodeca environment. Further, it is possible to use Excel conditional formatting and formulas to add business logic to your template. For this simple Excel template, add a few rows to accommodate a title, add some fonts to the titles, and set up some column labels and borders for the data you wish to retrieve. The formatted template may now look similar to the template below.
Adding a Retrieval Range
Dodeca uses defined names in the Microsoft Excel template to indicate retrieval ranges. By convention, the range names for relational data are in the format DataRange.x, where x is a number. There can be additional range names in Dodeca by adding additional ranges. For example, if there are two separate retrieve range names required on a worksheet in Dodeca, use the range names DataRange.1 and DataRange.2 to define them.
| The range names are not guaranteed to be retrieved in numeric sequence. |
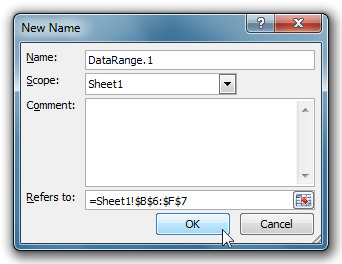
To add a retrieve range to the sample template, select cells B6 through F7 and select Insert > Name > Define from the Microsoft Excel menu. Type in the name DataRange.1 and click Add.
Finalizing the Template
At this point, the template is nearly complete and would work in Dodeca, but Applied OLAP typically recommends customers follow a couple of general spreadsheet clean-up methods.
-
To make the view look nicer, remove gridlines from the worksheet.
-
Another clean-up tip for the template is to add a freeze pane, allowing the user to scroll the retrieved data without scrolling the title and column labels.
-
Lastly, it is also a good idea to delete any unused worksheets from the template.
The Excel template is now complete and is ready to be saved to the hard drive. If there are formulas to protect, Excel’s cell protection can be used to do so. In this example, simply save the template to a file named Employee Contact Info.xls.
Importing the Excel Template into Dodeca
For a step-by-step guide to importing an Excel template into Dodeca, see the "Importing the Excel Template into Dodeca as a Binary Artifact" section of the previous chapter.
For the purposes of this tutorial, when creating the new Binary Artifact, assign a Name and ID of "Employee Contact Information" and a Type of "Excel".

Then, simply import the recently created Employee Contact Info.xls and then click, Commit.
Creating a New SQL Excel View Definition
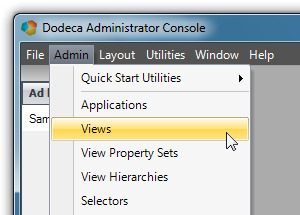
To create a new SQL Excel view in the Views metadata editor, select Admin > Views.
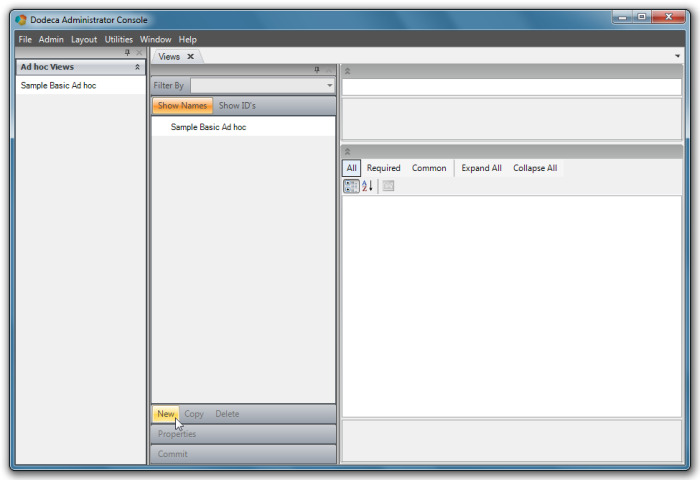
Once the Views metadata editor opens, click New located in the command buttons area at the bottom of the metadata list panel.
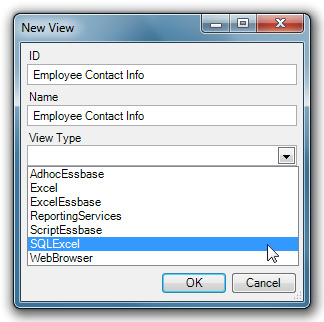
The New View dialog is displayed.
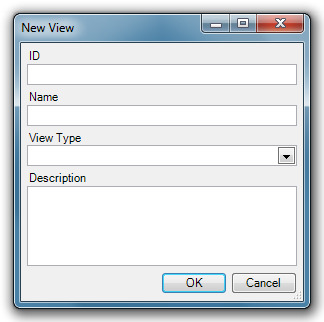
In this dialog, enter the ID and Name of the new view to be created. The ID is the name under which the view is stored in the database and the name is the "friendly" name the user sees. It is recommended that the ID and the Name be the same for ease of administration. In this case, for example, the name Employee Contact Info could be used as we are going to create a view for displaying employee contact information.
| The name used in this example coincidentally is the same name used for the Microsoft Excel template. The Microsoft Excel template is not required to be named the same as, or even similar to, the view ID or view name. |
The View Type for a SQL Excel view is SQLExcel. This view type is similar in some ways to the AdhocEssbase and ExcelEssbase view types, but adds some properties to the view that are unique to using a Microsoft Excel template populated by relational data.
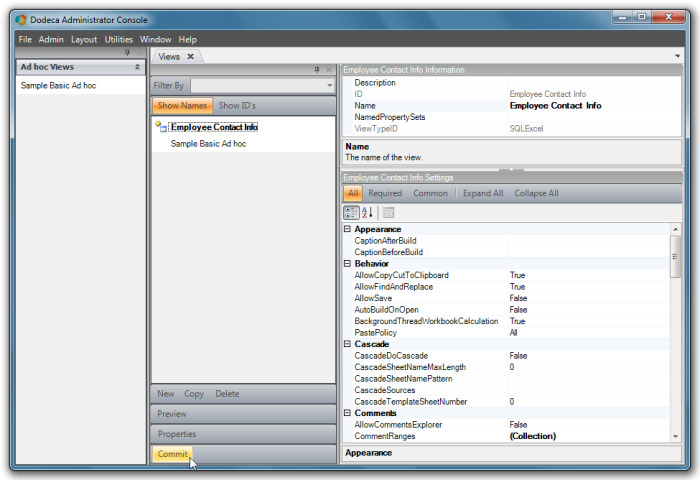
Click OK and the view is added to the metadata list with an edited icon, the new view is selected, and the property grid shows the properties for the new view. Further, the Commit button becomes enabled. At this point, the new view exists only in the metadata editor and has not yet been stored in the Dodeca database.
| If you are interested in the programmatic layer underlying Dodeca, the software classes that provide functionality for the AdhocEssbase view type is a base class under the SQL Excel view type class. In other words, the SQL Excel view type inherits from the AdhocEssbase view type and extends its functionality to allow the use of Excel templates with Relational Data. |
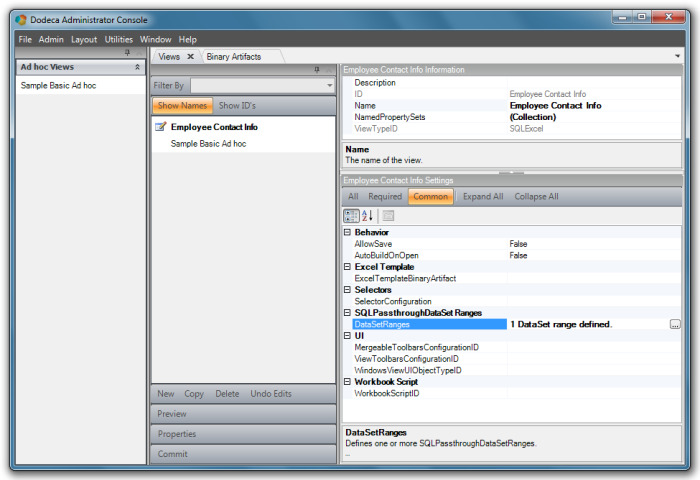
Setting Properties for the New SQL Excel View
To complete the view and make it useful for end users, some key property values must be modified.
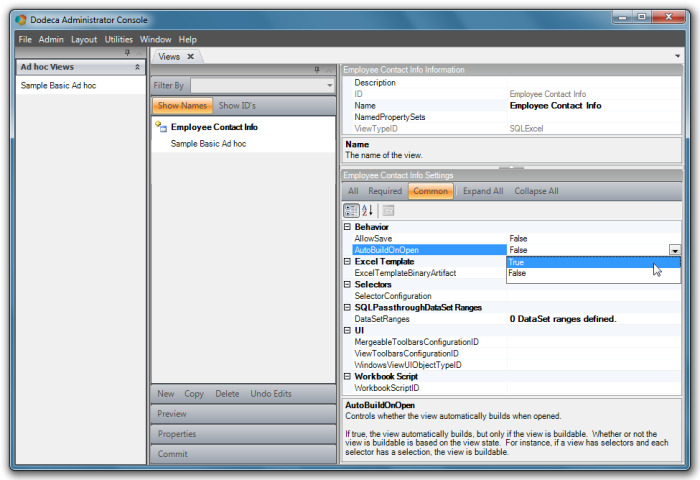
Before we continue, press the Common button at the top of the settings panel to limit the visible settings to those commonly used. The settings now available will be sufficient for our purposes here.

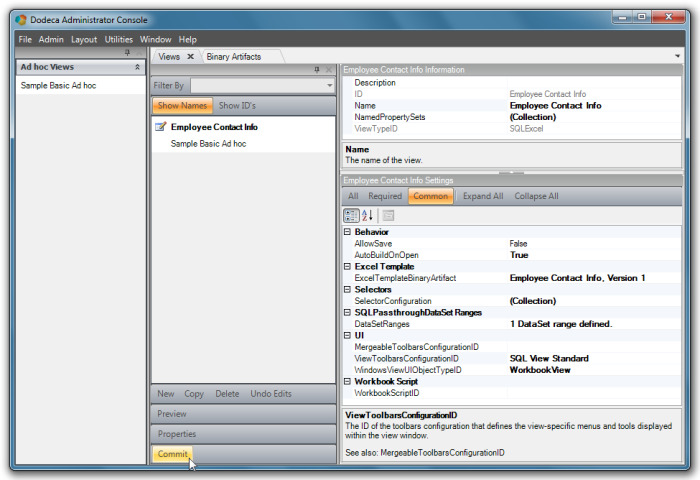
First, in the Behavior category, set the AutoBuildOnOpen property to True. Because there are no selectors to choose from, this property allows the view to build automatically upon opening.
Scroll down to the Excel Template category. The ExcelTemplateBinaryArtifact property ties the Excel Template you stored earlier as a Binary Artifact object to your SQL Excel view. To select the template, select the ExcelTemplateBinaryArtifact property, then click the dialog indicator button located at the right side of the property value column as shown below.
When you select this button, the Select Excel Template Binary Artifact dialog displays. In this dialog, select the Microsoft Excel template (Employee Contact Info in the example).
| If the Microsoft Excel template does not appear in the dialog, possible problems are forgetting to set the artifact type to Excel or forgetting to commit changes in the Binary Artifacts metadata editor. |
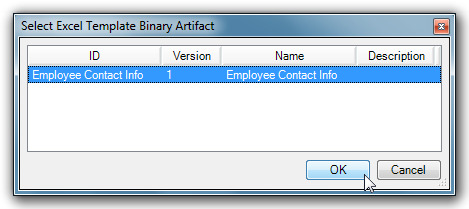
Select the Employee Contact Info version 1 and click OK. The template information is then pulled into the View definition.
| It is possible to create multiple versions of the same template in the Binary Artifacts metadata editor and store them in the Dodeca metadata store. Doing so allows an administrator to easily switch between versions in the Views definition form. |
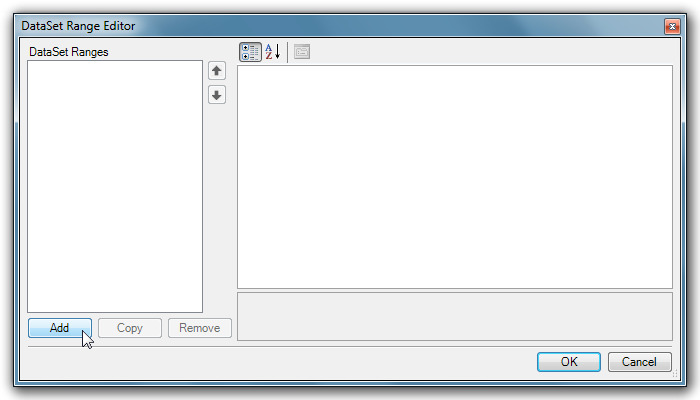
Next, scroll down to the SQLPassthroughDataSet Ranges category and select the DataSetRanges property. Again, a dialog indicator button displays.
Click the dialog indicator button and the DataSet Range Editor dialog displays.
The DataSet Range Editor is used to associate a SQLPassthroughDataSet with a view and specify the related settings.
To add a DataSetRange, begin by clicking Add.
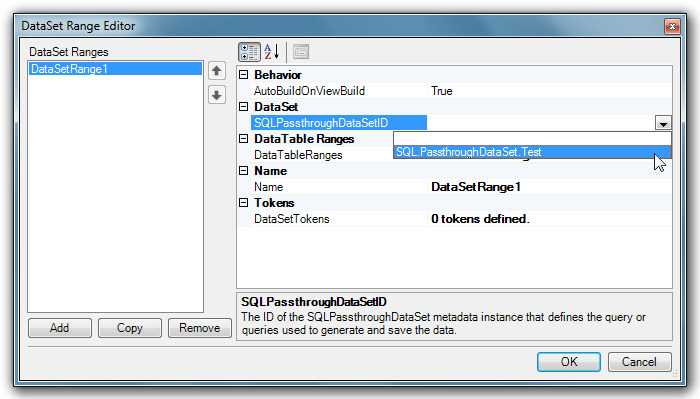
Under the Behavior category, set the AutoBuildOnViewBuild property to True.
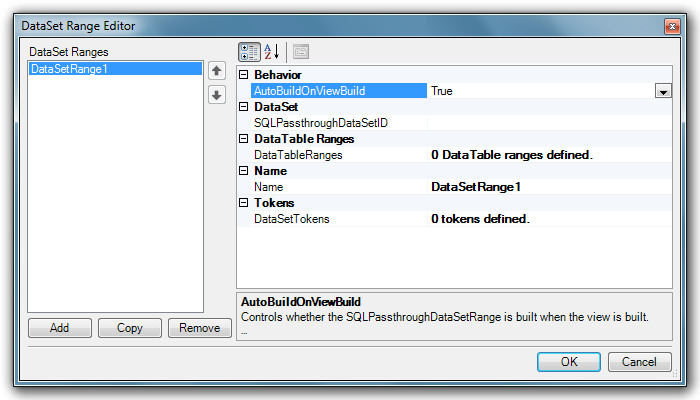
Next, under the DataSet category, set the SQLPassthroughDataSetID property to use the SQL Passthrough DataSet that we defined earlier in Defining a SQL Passthrough DataSet.
Then, under the DataTableRanges category, select the DataTableRanges property. A dialog indicator button displays.
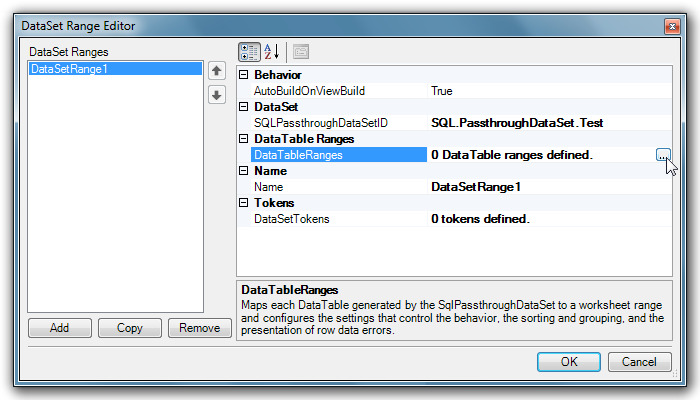
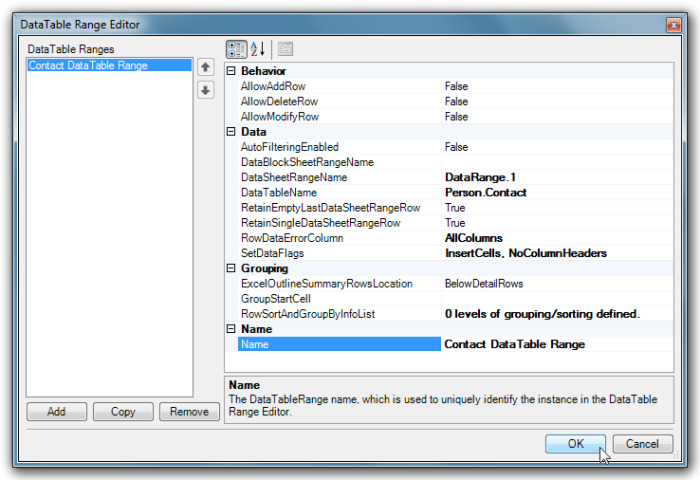
Click the dialog indicator button and the DataTable Range Editor displays.
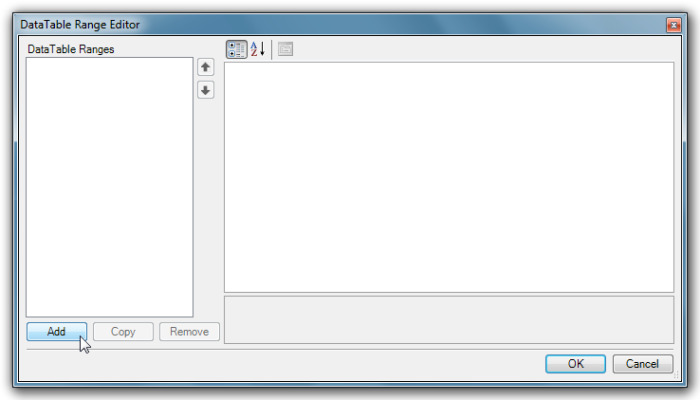
The DataTable Range Editor is used to define the DataTableRanges that map each DataTable to a sheet range.
To add a DataTable Range, click Add.
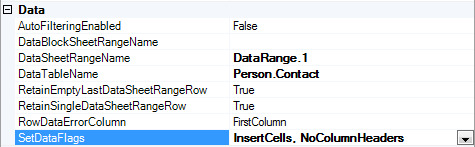
Under the Data category, select the DataSheetRangeName property.
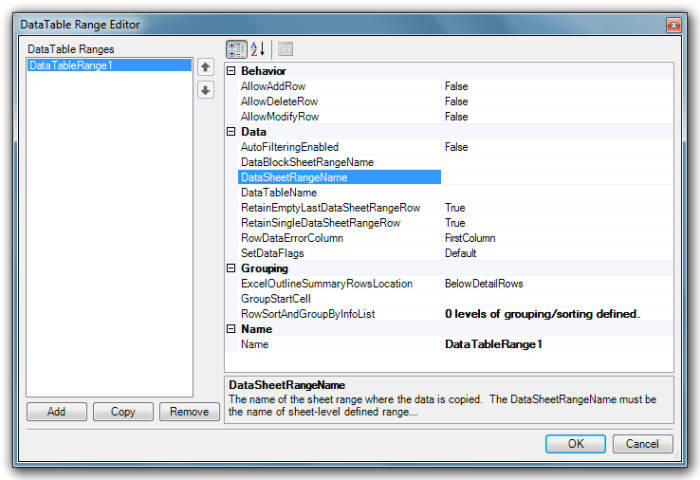
The DataSheetRangeName property value must correspond to the name of the range name specified in the Microsoft Excel template created earlier. See Adding a Retrieval Range for additional information.
The DataTableName property value must correspond to the name of the table from which you are querying your relational data, as specified earlier in the SQL Passthrough DataSet. See Defining a SQL Passthrough DataSet for additional information.
The SetDataFlags property controls how the relational data is copied to the retrieval range. For our purposes, because we wish to insert cells for each row of data retrieved, and because our column headers are outside of the retrieve range, we will specify InsertCells and NoColumnHeaders from the dropdown.
Next, under the Name category and property, specify a name for the DataTable Range.
When the property values have been assigned, click OK to assign the newly created DataTable Range to the DataSet Range and return to the DataSet Range Editor.
Upon returning to the DataSet Range Editor, specify a name for the DataSet Range under the Name category and property.
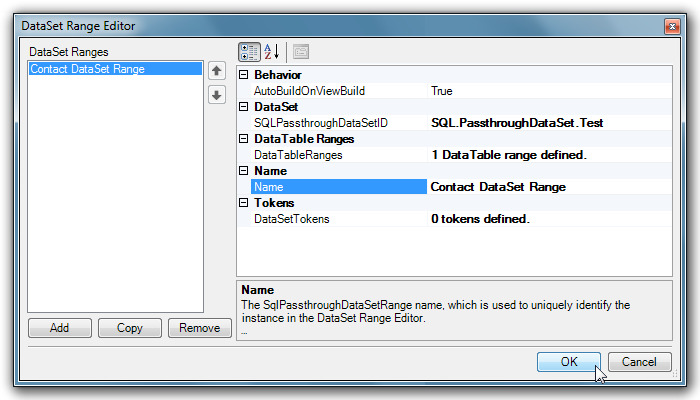
Finally, click OK to exit the DataSet Range Editor and return to the Views Metadata Editor.
Under the UI Category, set the ViewToolbarsConfigurationID property to SQL View Standard and the WindowsViewUIObjectTypeID to WorkbookView.

Click Commit to save the changes to the view definition, and then close the Views metadata editor.
Exposing the SQL Excel View to Users in a View Hierarchy
Just like the Ad hoc and Essbase Excel views, the final step necessary to expose the view to the user is to place it on one or more view hierarchies. The steps are the same as those used to place the Ad hoc view on a hierarchy:
-
Select Admin > View Hierarchies from the menu.
-
Expand the hierarchy by clicking the down arrow expansion icon.
-
If desired, add a new item (“category”) for the view.
-
Add the view to the category.
-
Click Commit to save the hierarchy to the metadata database.
-
Close the View Hierarchies metadata editor.
Testing the New SQL Excel View
To test the new Essbase Excel view, right click on the View Selector and select Refresh from the context menu.
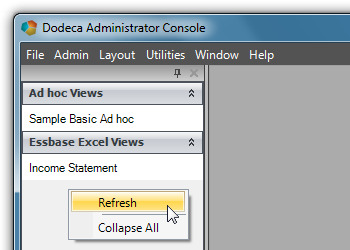
The Refresh button forces a re-read of the hierarchy metadata stored on the server (which, of course, was just modified) and displays the newly updated hierarchy.
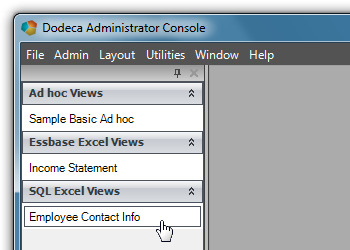
Click on the new view to test it.
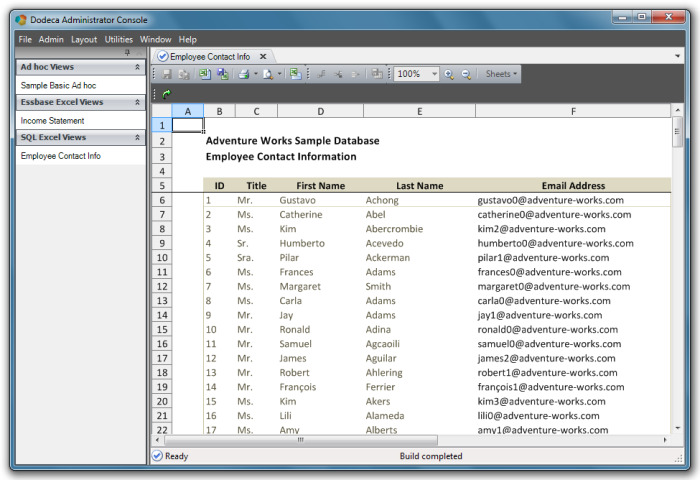
The new SQL Excel view is now complete and ready to be deployed to users. The same general steps used in creating the Ad hoc and Essbase Excel Views were used to create the SQL Excel View:
-
Create the Microsoft Excel template for the view.
-
Create the new view in the Views metadata editor.
-
Modify relevant properties of the new View and commit the changes.
-
Expose the new View on a View Hierarchy.